Markers Mode
Description
In this mode, the user places, on each image, one marker at a given fixed location. This can be repeated using more markers. Then the algorithm will align those markers to obtain the best alignment of all the markers.

Tutorial
After launching the markers mode, a window named Markers pops up. This window contains 1 tab where a table lists all the images previously loaded via the notebook.
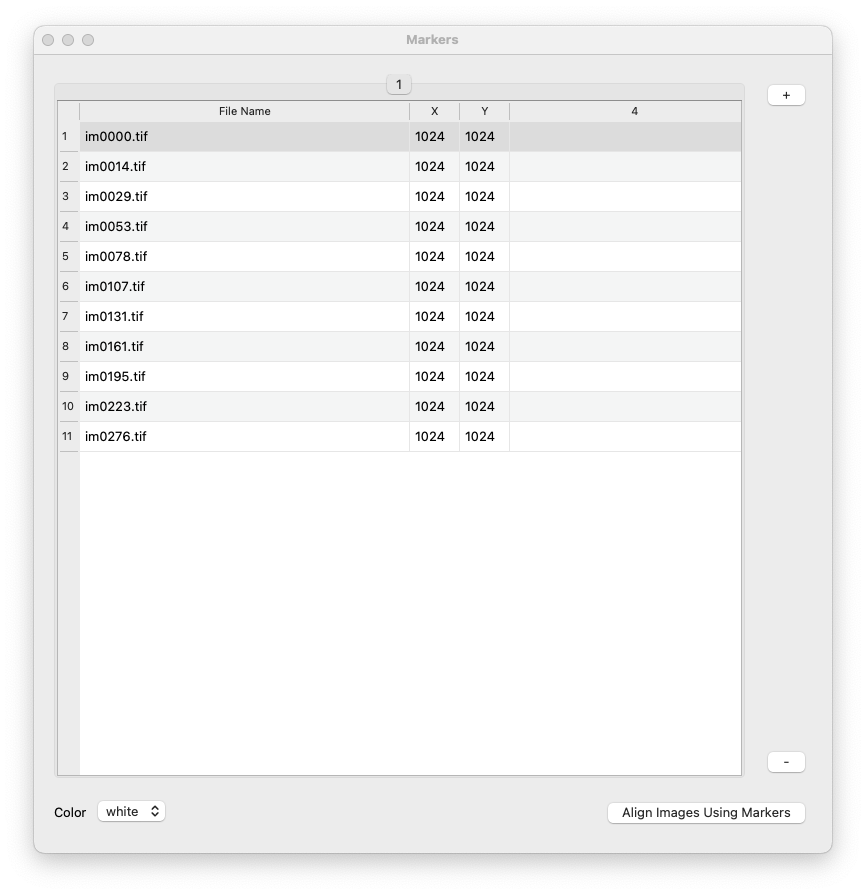
In the main window, a white block is displayed in the center of the image. This is the default marker. Each image has its own marker that can be moved around within the image using either the mouse or by manual entry in the table.
The goal is to place, for each image the marker at the same position (as illustrated here).
It’s possible to use more than 1 marker. To do so, click the + button at the top right corner of the Markers window. To remove any of the markers, click the – button at the bottom right.
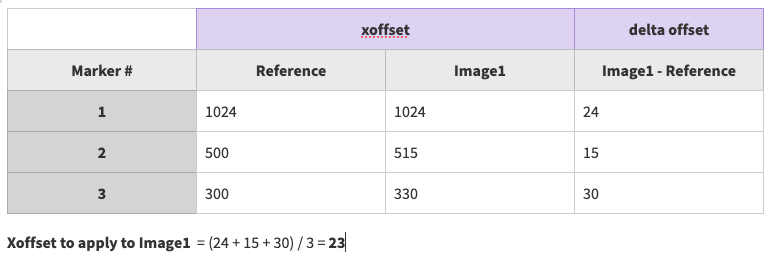
The xoffset and yoffset will be calculated using the average value of all the x, and y offsets of all the markers.
For example:
Offset interpolation between two images
In some cases, the sample moves linearly between two images that can be far apart. Instead of having to move the marker for each of the images between those 2 positions, it’s possible to define a linear interpolation between an image Im1, and another image Im2.
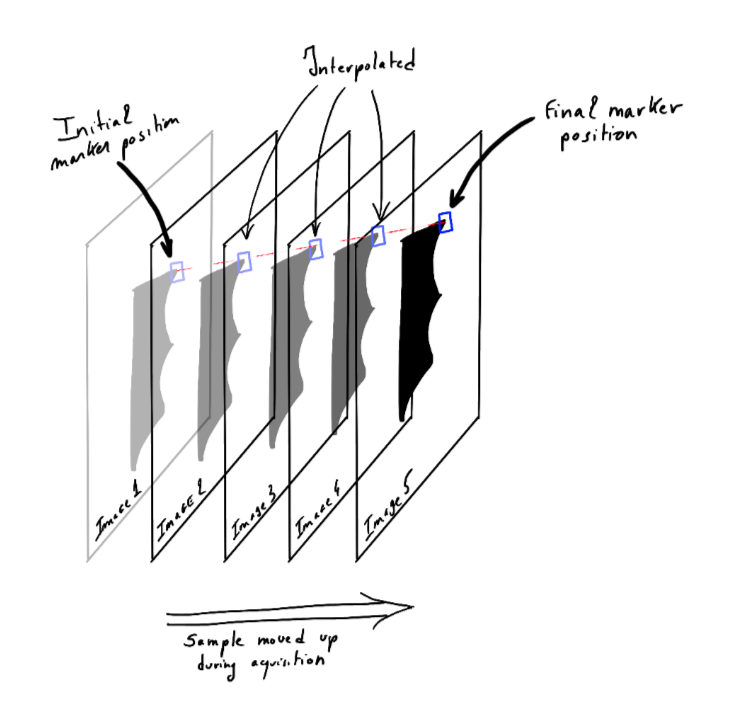
To define the first position of the interpolation, right-click in the table and select Set marker interpolation initial position. Move to the final image and define the new marker position, then click Set maker interpolation final position and process intermediate markers.f
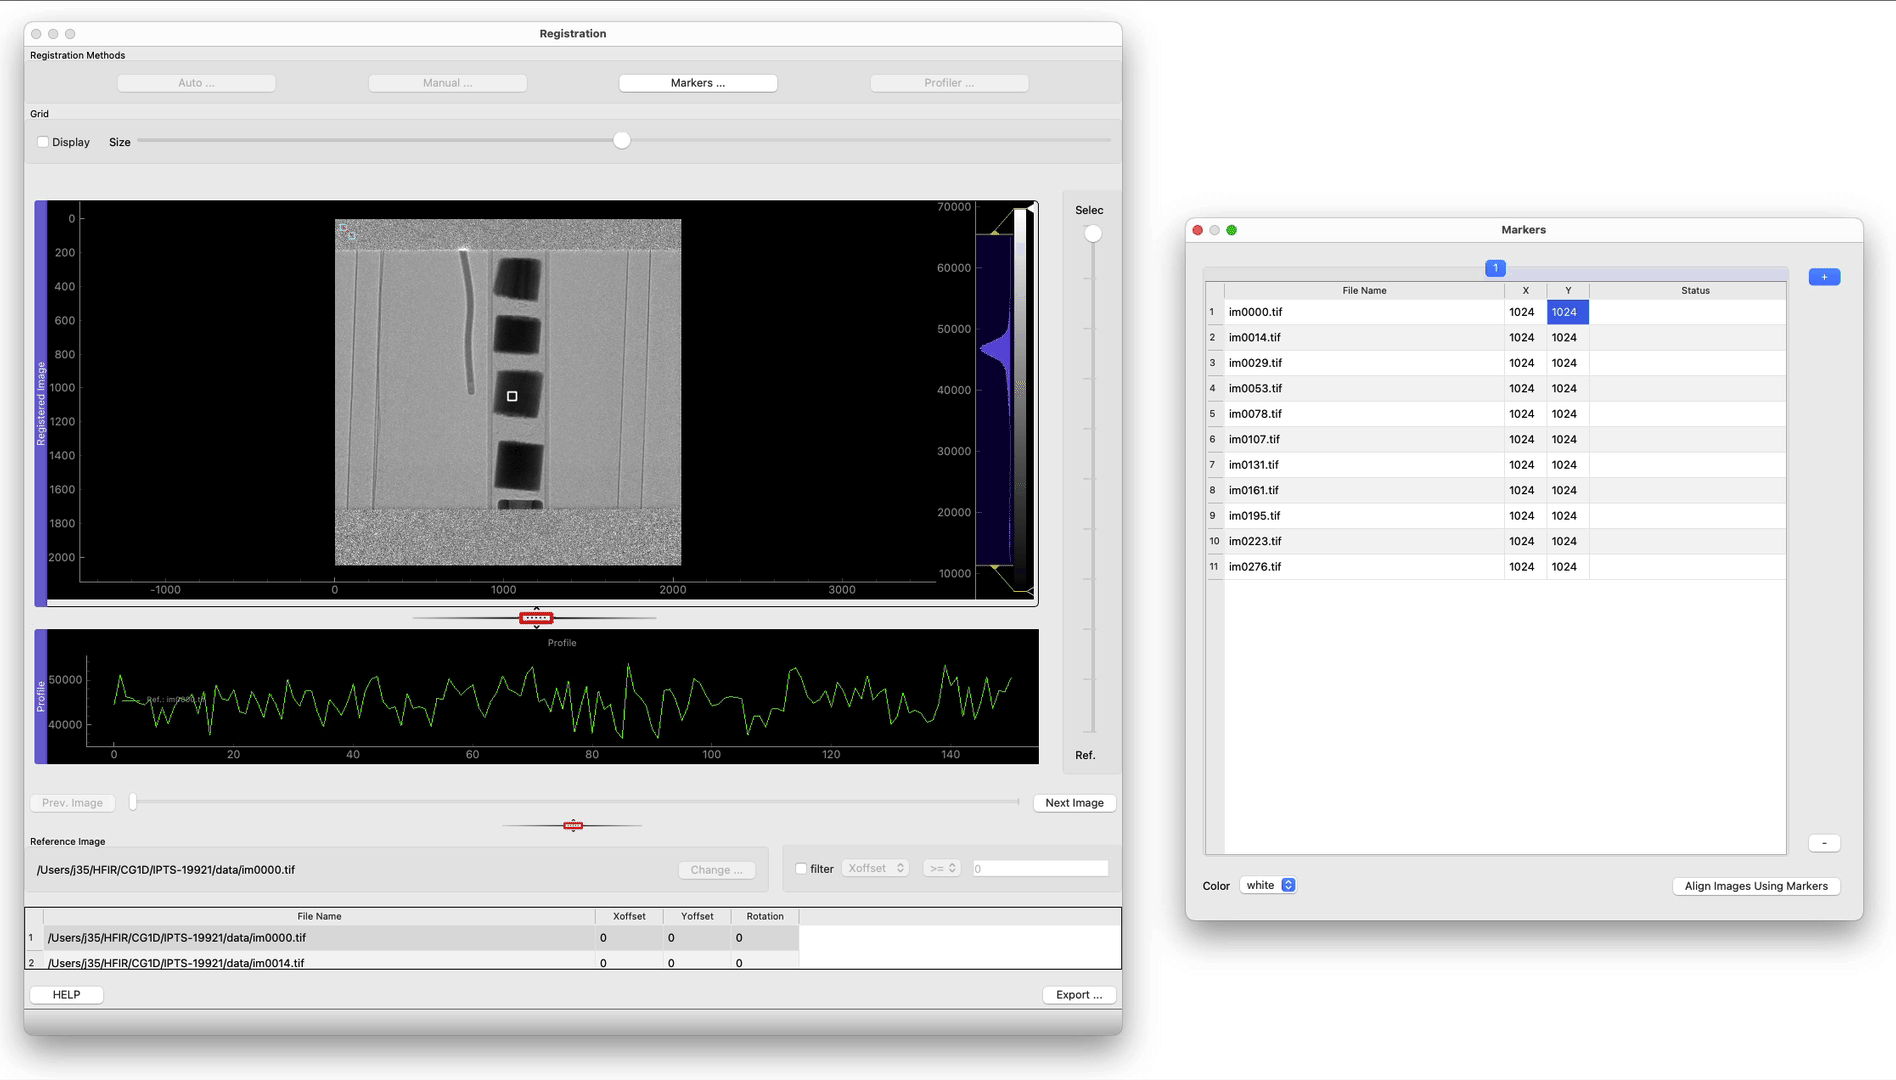
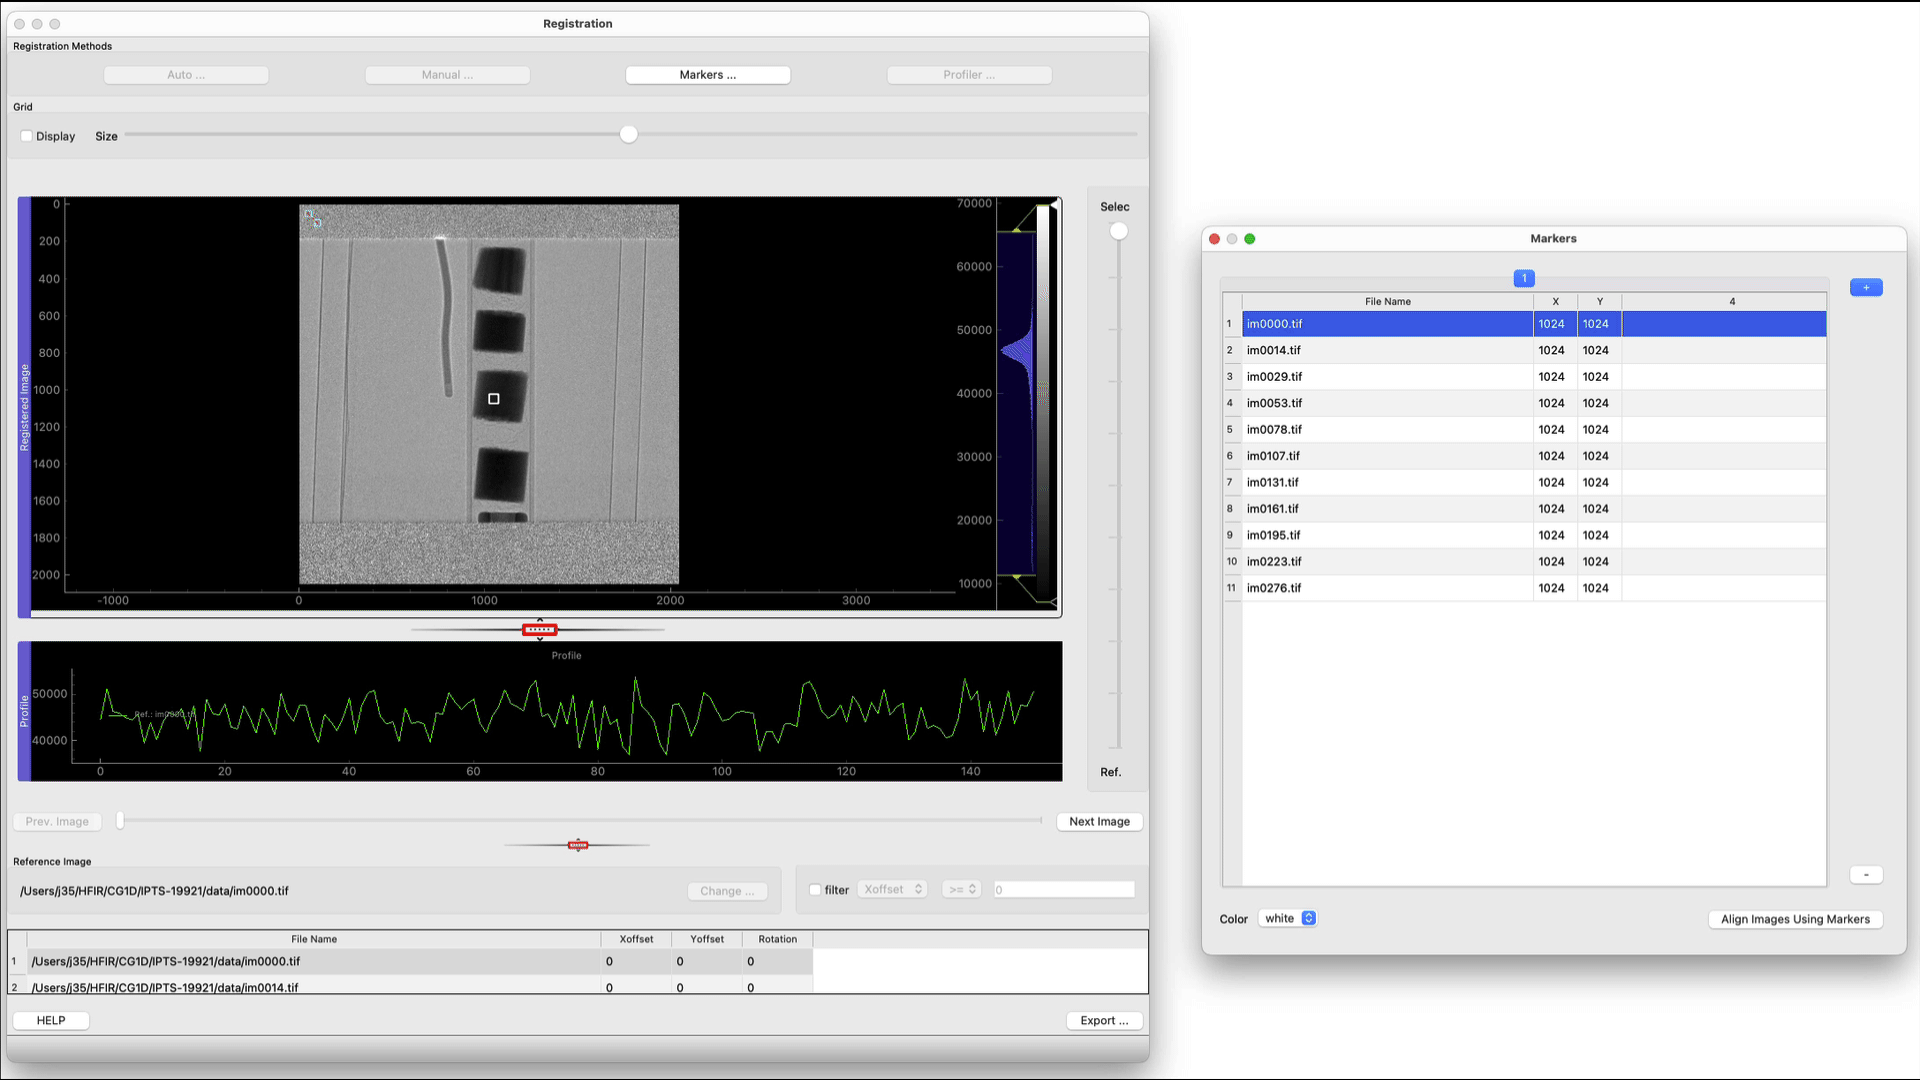
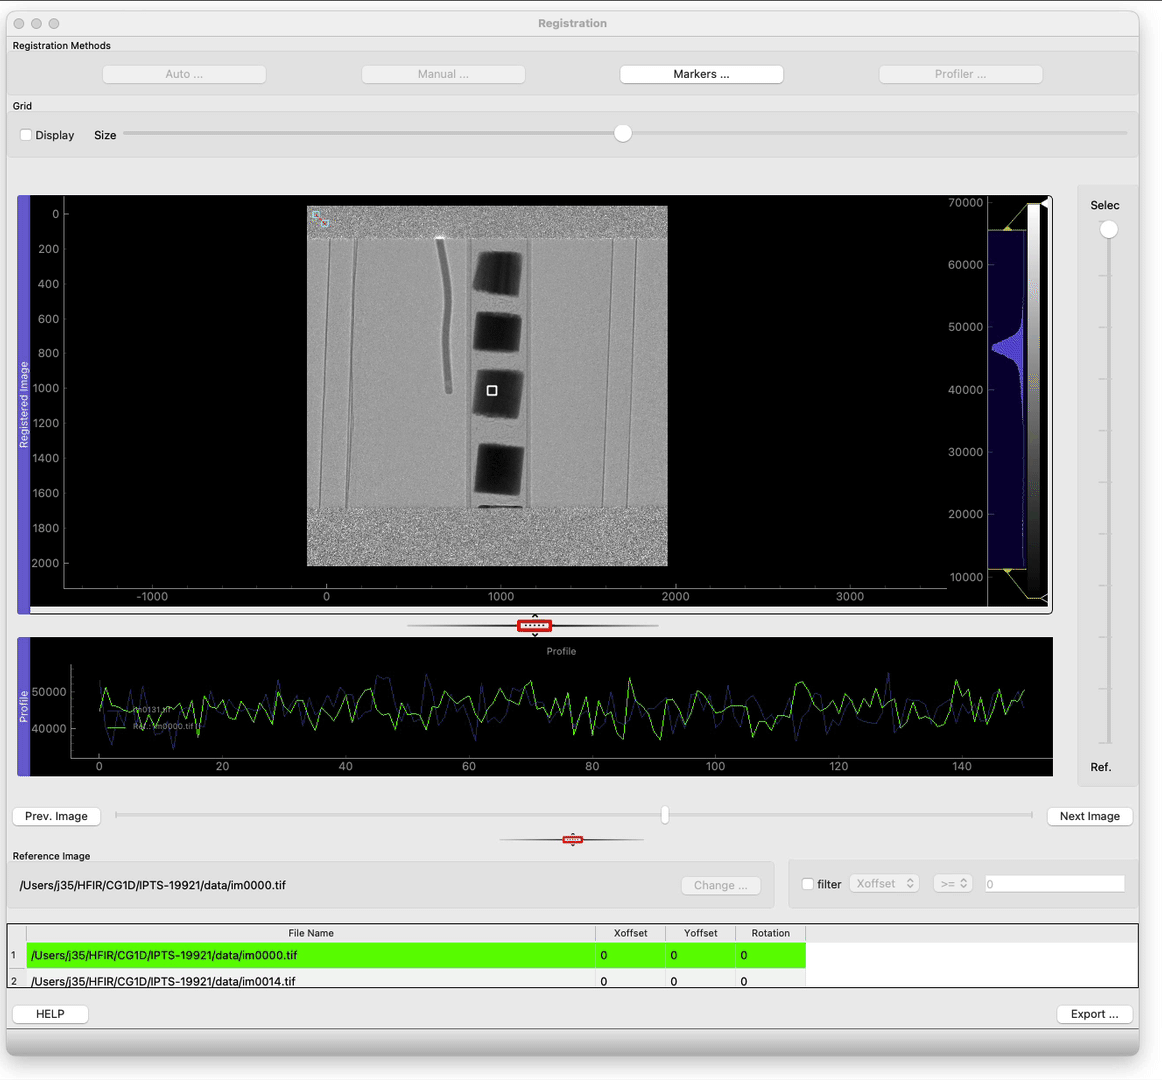
Registration
To complete the registration, click align images using markers.
