Extract evenly spaced files
Description
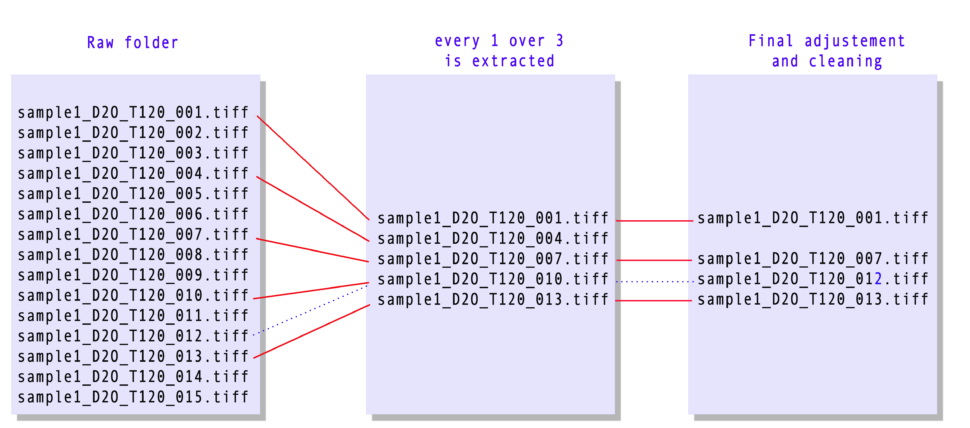
This notebook allows you to extract evenly spaced files from a folder and to clean the final list by either not considering one of the files to extract, or using another file instead. The following diagram describes the feature provided by this notebook.
Tutorial
Select your IPTS
Need help using the IPTS selector?
How to sort the data
You can either sort the data using
- the file name of the images
- the last modified time of the images

Select a folder with images to extract
Using the file selection tool, select the folder that contains all the images you want to extract. Files supported are JPEG, TIFF, and FITS.
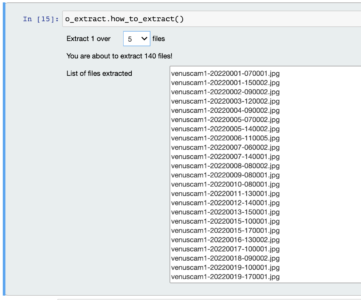
Extraction method to use
This is where you specify the number of files to skip between files to extract.
Manual review of working files (OPTIONAL STEP)
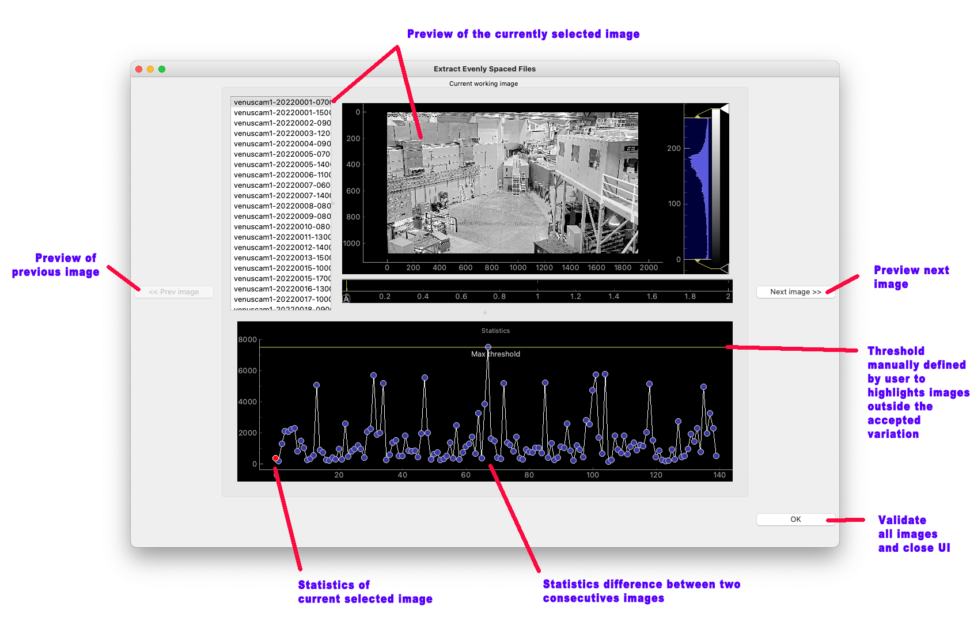
This UI will allow you to make a final adjustment to the list of images to extract.
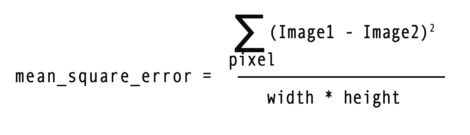
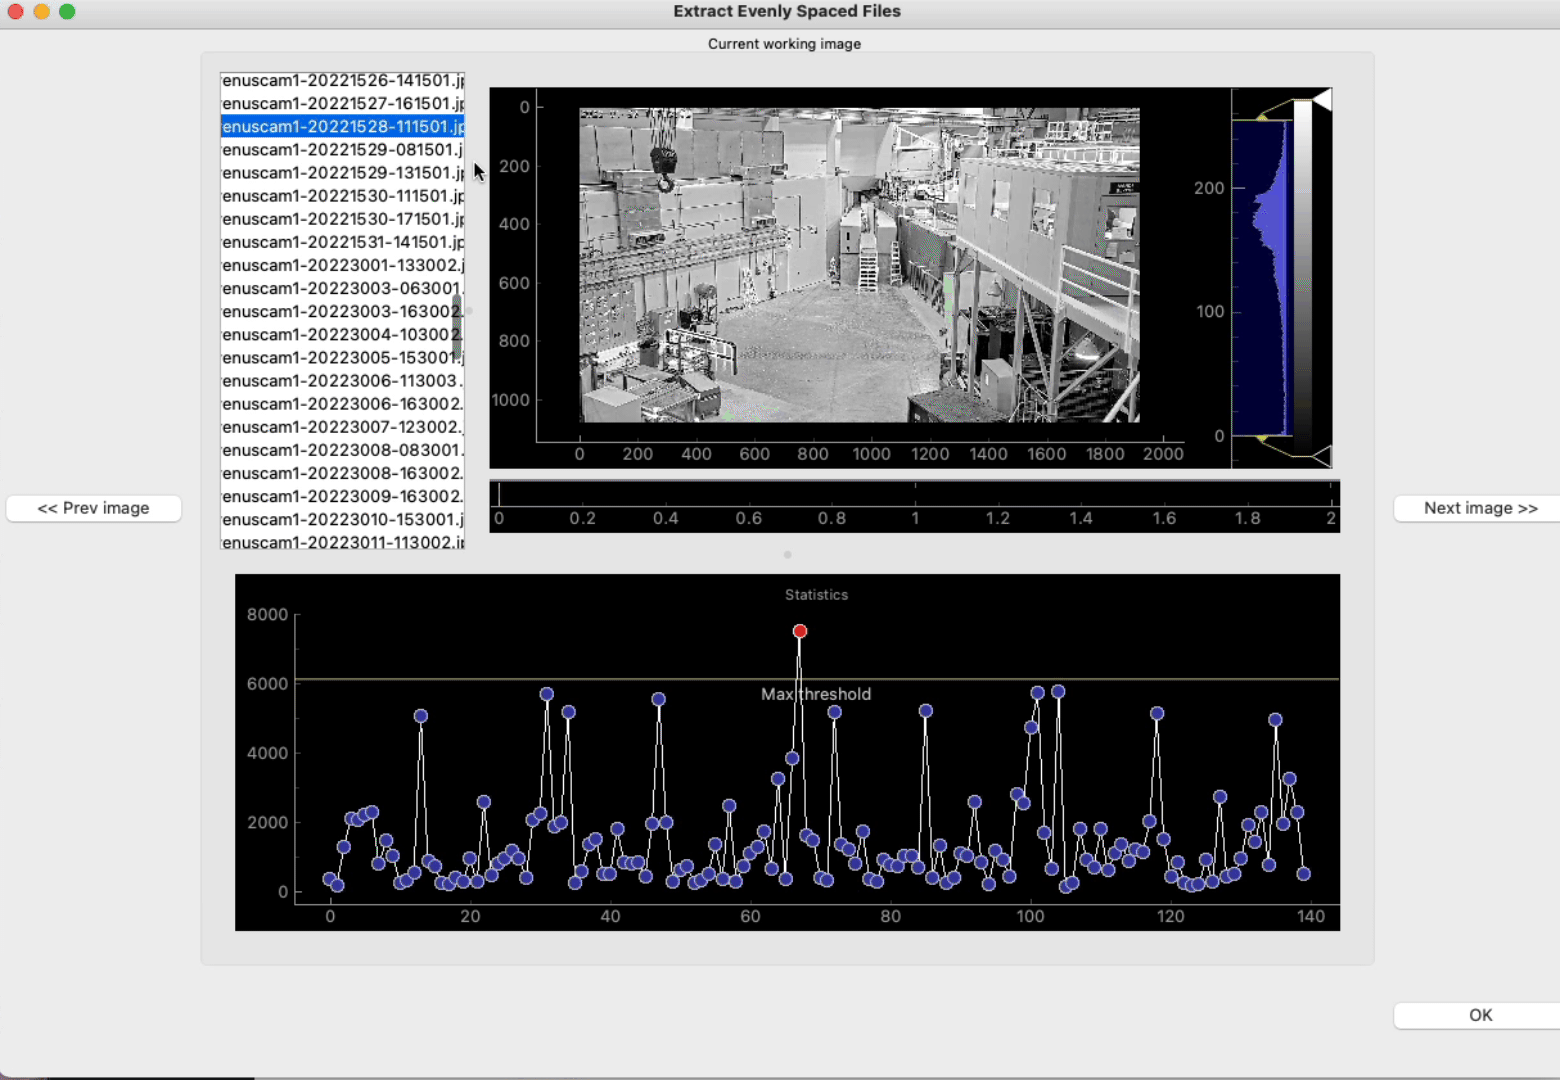
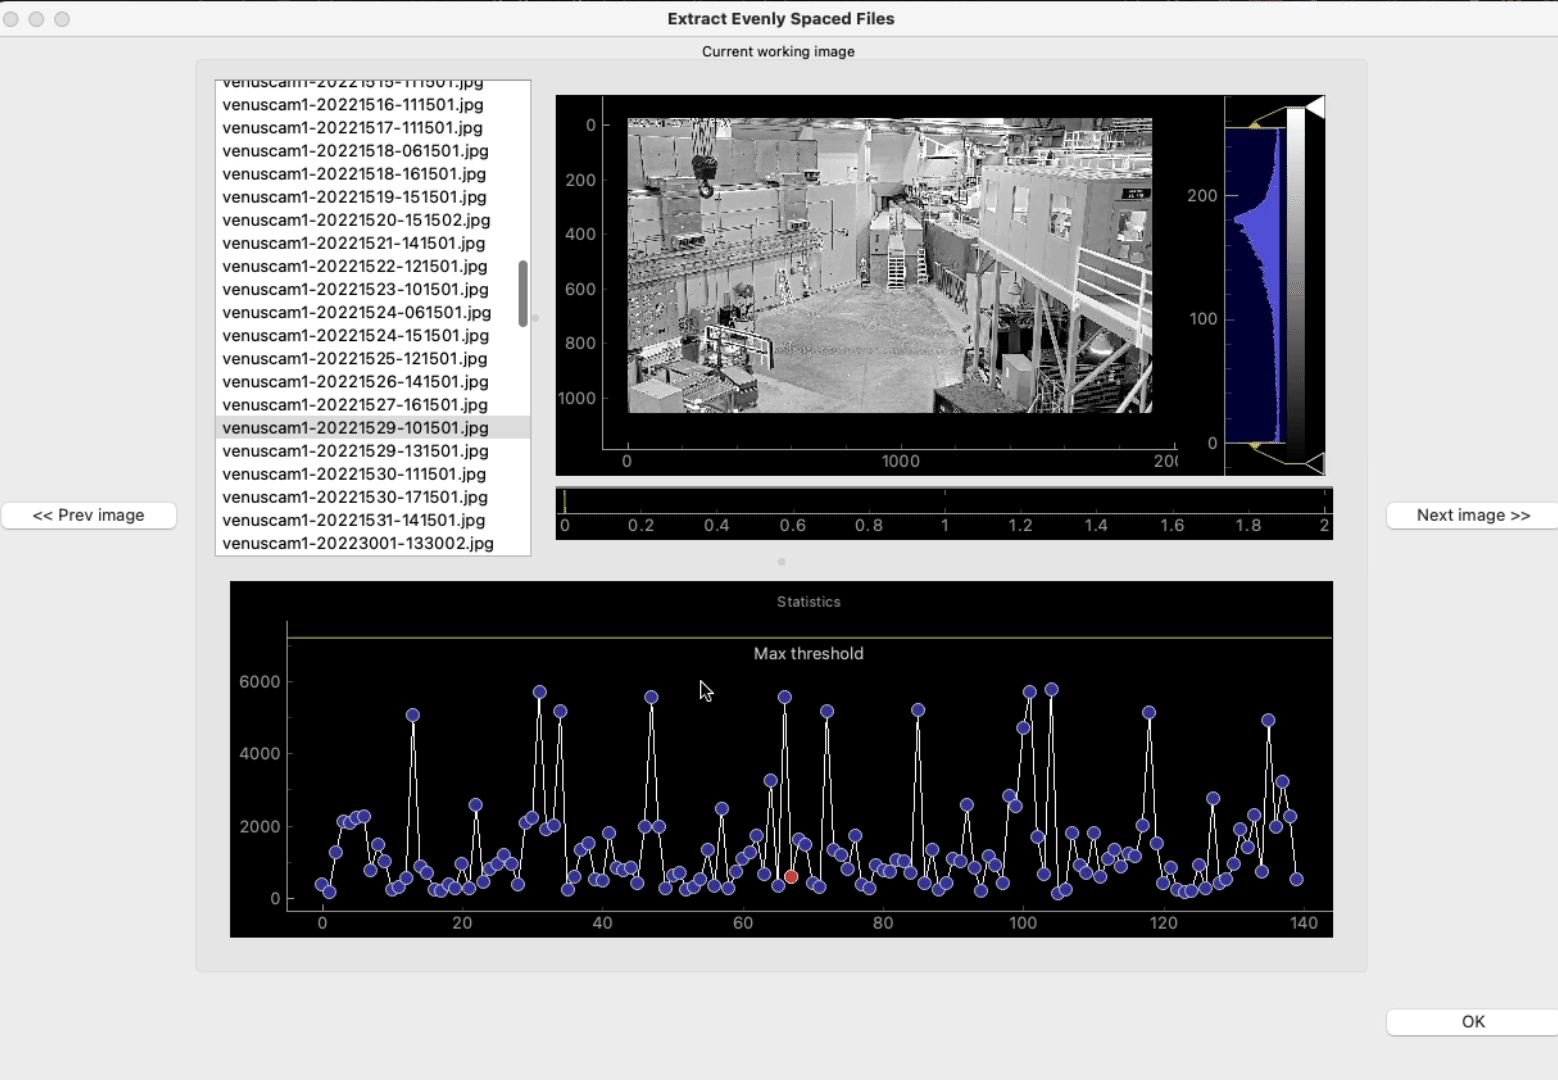
The current list of images to extract is displayed on the left. The image selected is displayed in the center window. The bottom plot shows the mean square error of two consecutive images defined as
The currently previewed image is also highlighted in the bottom graph (red marker).
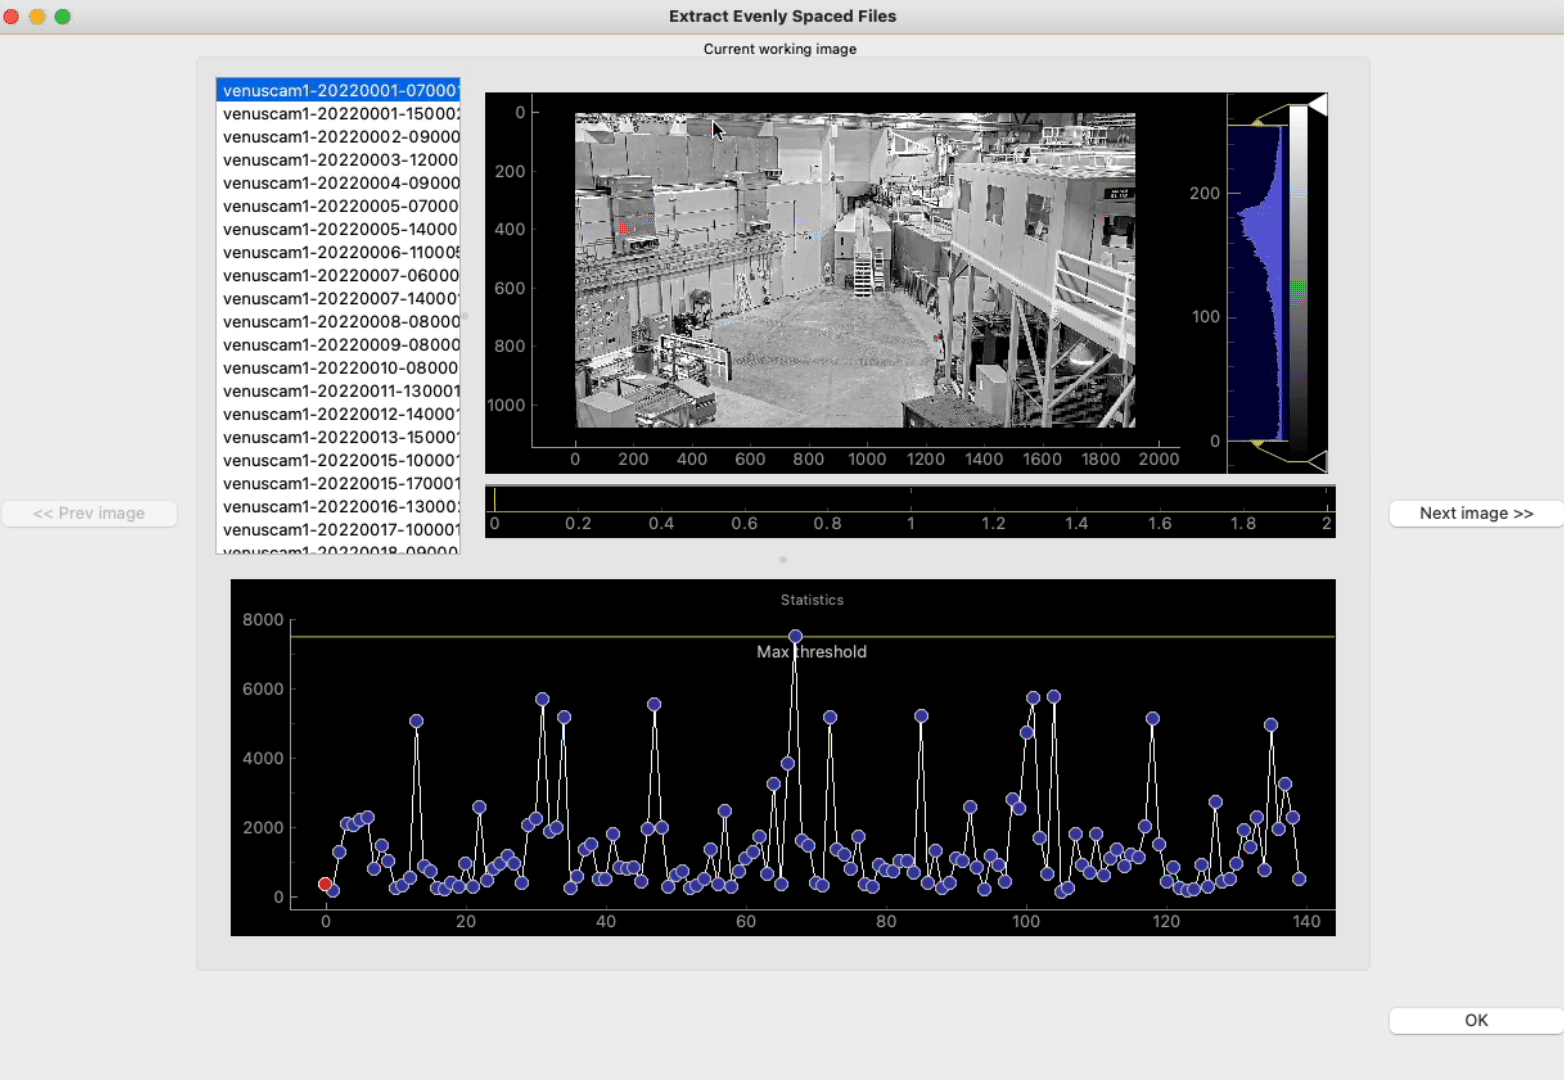
The max threshold can be moved using the mouse to highlight the images that need to be worked on.

If an image statistics goes above your defined range, you can either
- remove that image
- choose a neighbor image
What is the need of providing those statistics?
In some cases, like when creating a time-lapse of a construction site, the camera is moved for a few hours and then returns to its initial position. This is where the mean square error between two images will be much higher than the rest of the stack, and shows where the camera got moved.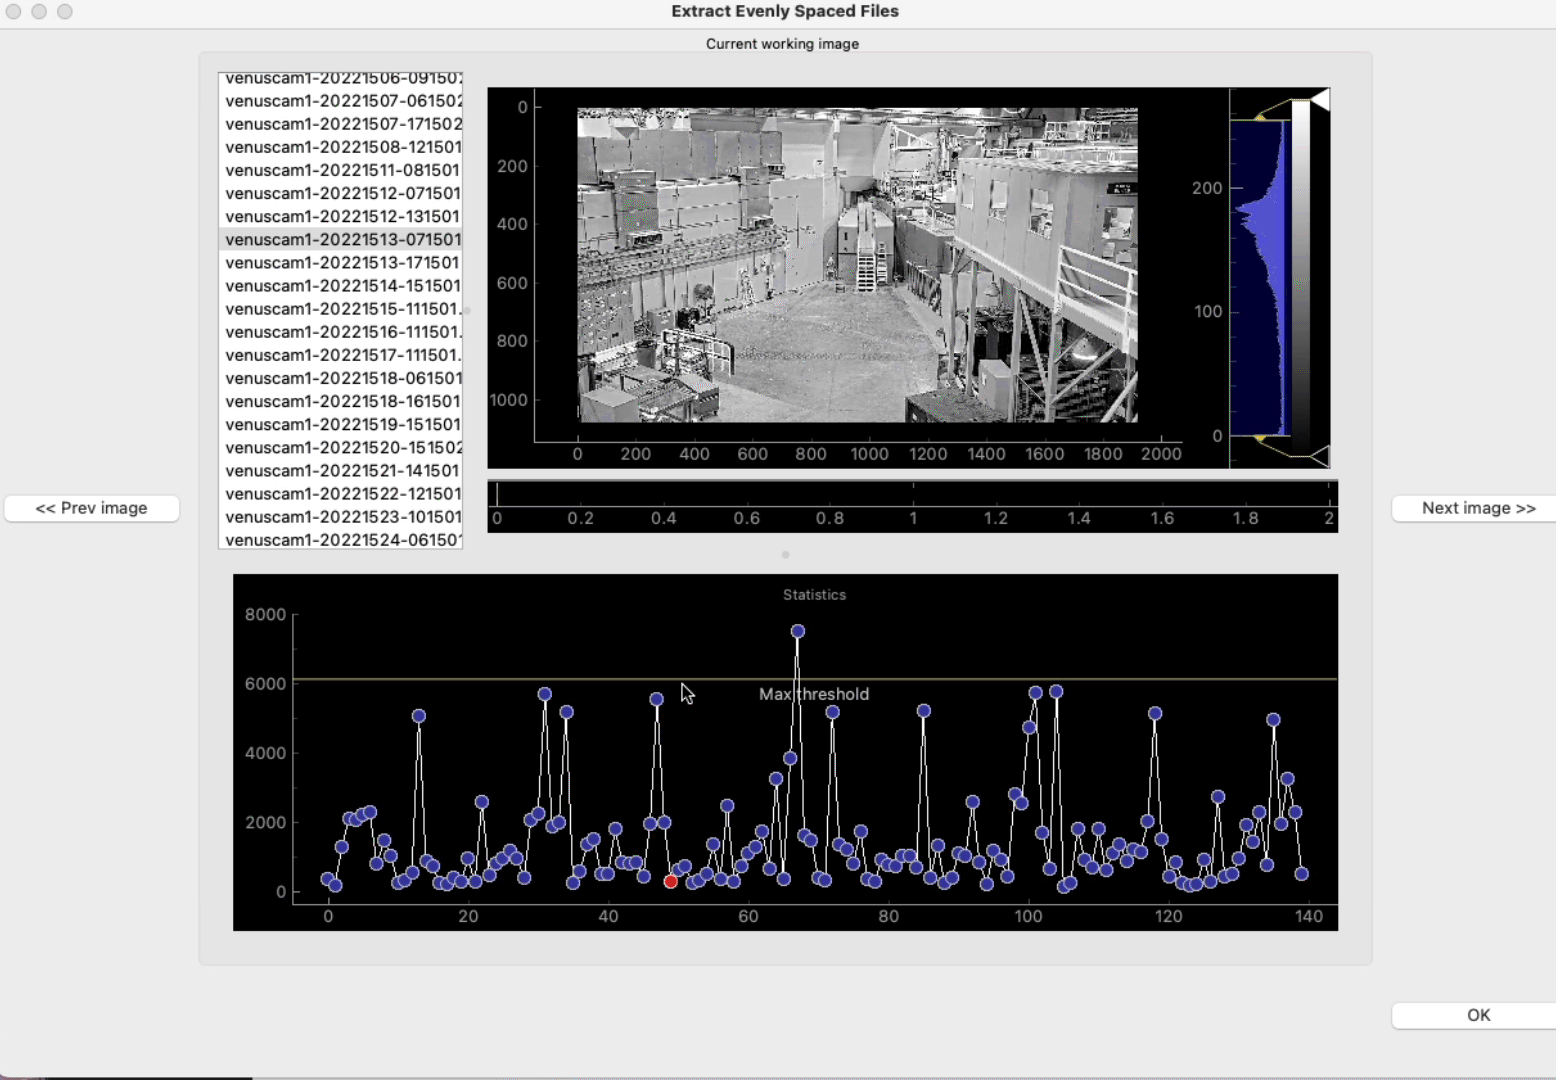
Removing or replacing
When an image is outside the range, you have 3 options
- you leave the image as it is
- you remove the image
- you replace the image
removing the image
with the image to be removed selected, right-click the table and select remove. The list of files will be updated and statistics of the entire stack recalculated.
Replacing the image
In this case, a new UI will pop up.

Once the replace UI shows up, select from the top right drop-down list the new image to use, then click ok and close the window.
Once you are happy with the selection of images to extract, click OK to return to the notebook.
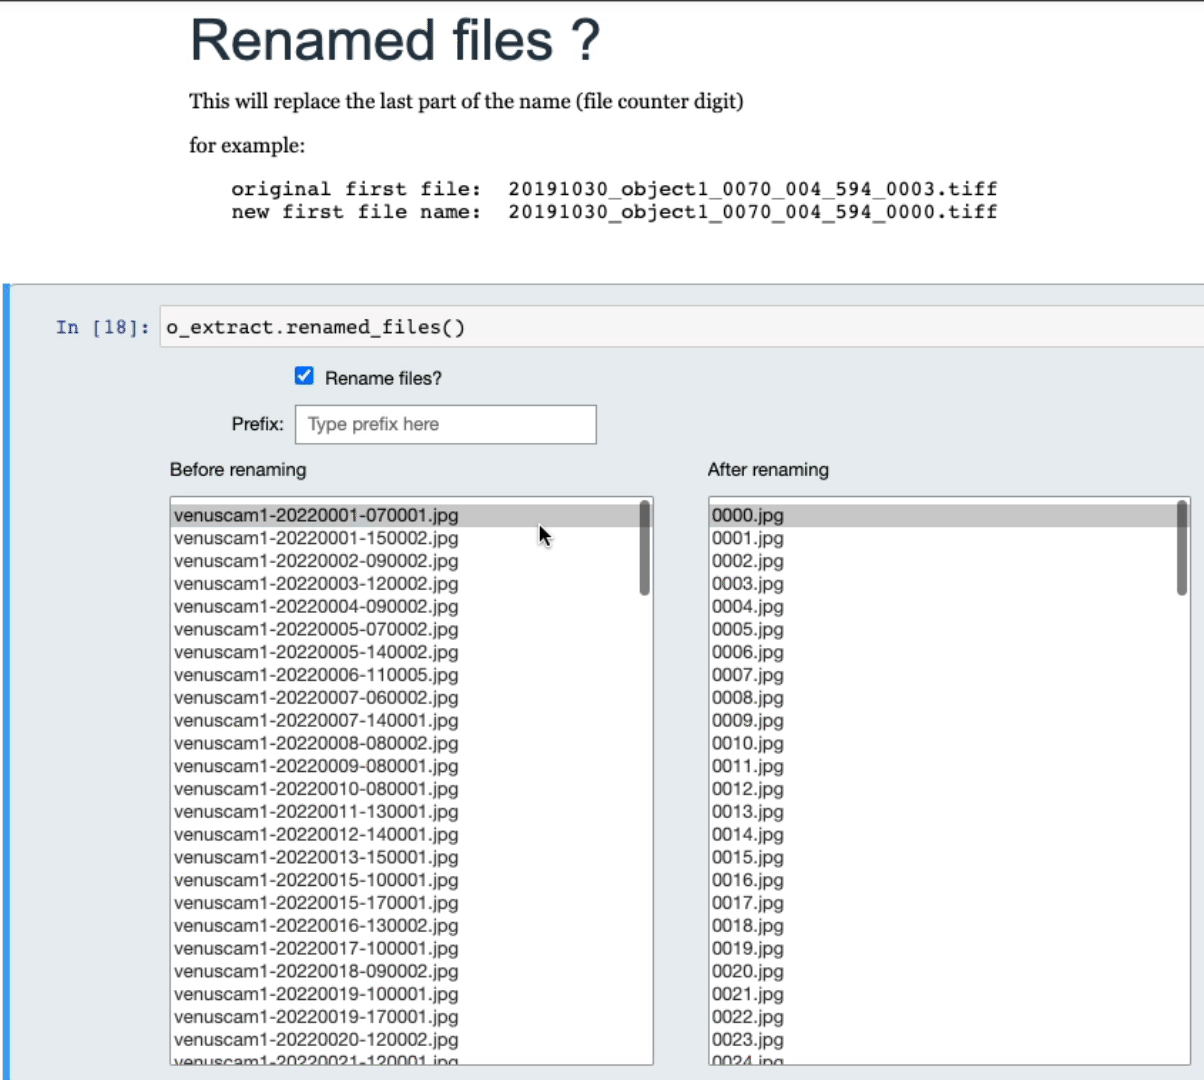
Renamed files?
The cell you propose to rename the files. This is very useful as the new file index increment will start from 0 and increase by only 1 unit.
Select output folder
Using the folder selection tool, select where you want to export the images extracted.
Once the process is done, a message will let you know where and how many files have been created.

