Panoramic stitching for white beam
Description
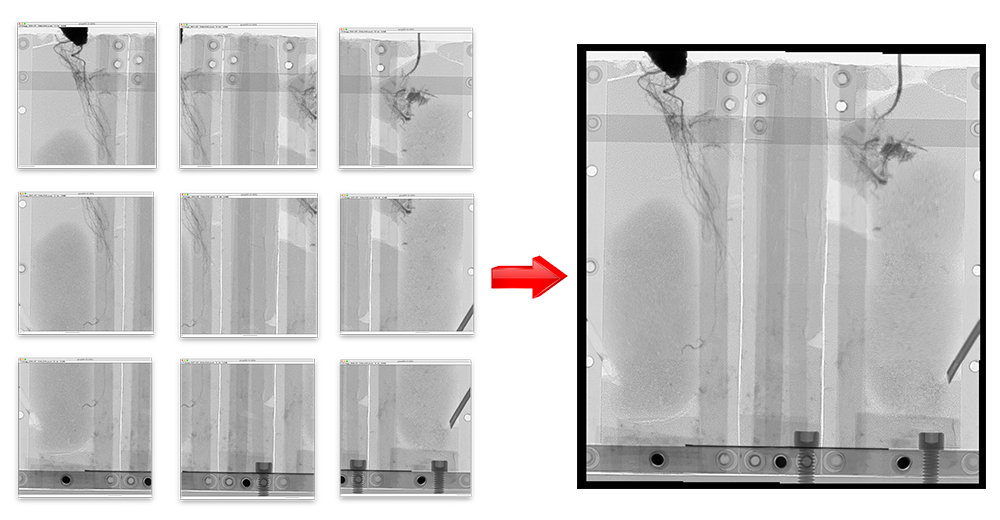
The main goal of this notebook is to stitch a set of images as shown here.
This notebook takes a set of folders as input, such as the one created by the group_images_by_cycle_for_panoramic_stitching. You need to manually stitch the images of one of those folders and then the notebook will apply the same settings to all the other folders by matching motor_position/pixel_offset.
By default, this notebook is defined to look for the 2 motor parameters called MotLiftTable.RBV and MotLongAxis.RBV. (contact Jean Bilheux to customize the notebook to other motor names).
Tutorial
Select your IPTS
Need help using the IPTS selector?
Select folders to process
Using the folder selection tool, select all the folders you want to work on. Each folder must contain the TIFF images of single panoramic stitching (all the images of that folder will be stitched together).
Interface presentation
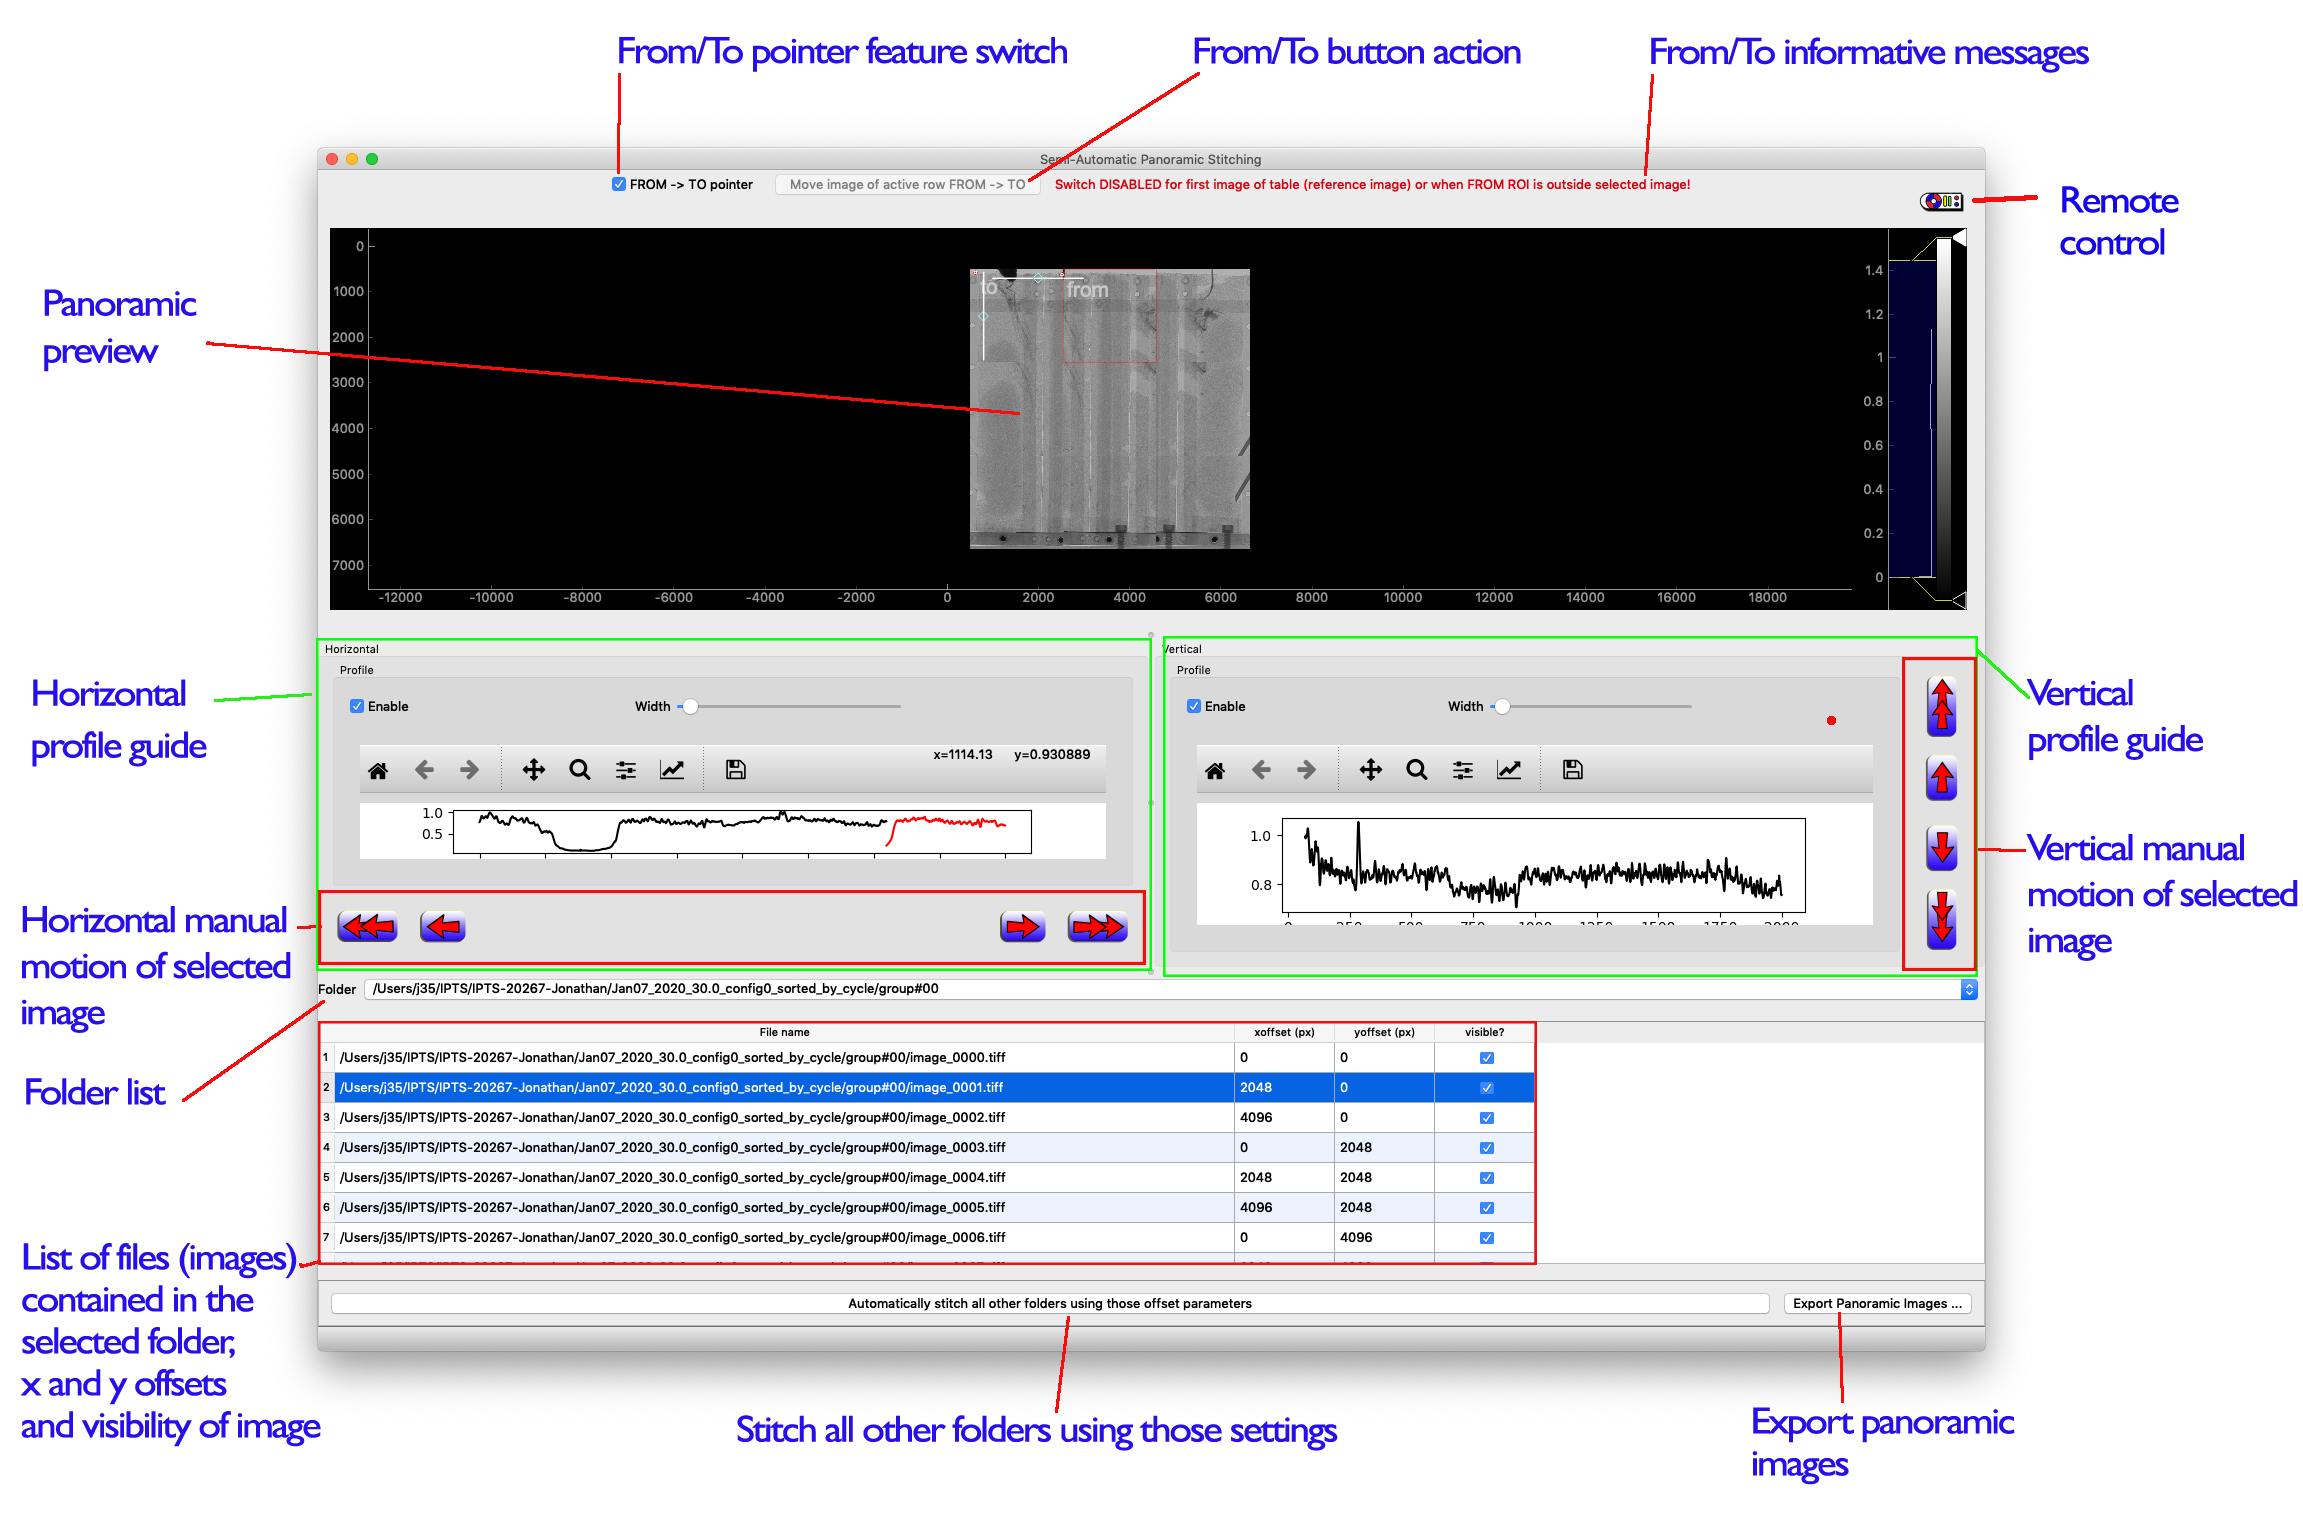
The UI has been designed to help you stitch all the images of the first, by default, folder selected. Once this is done, you will click the Automatic stitch all other folders using those parameters button to stitch all the other folders/images. Then you can export the panoramic images created as TIF
Step by step tutorial
Step 1 – stitch one group of images (any of them will do the job)
The top left corner image, the first image/file from the list, is fixed. This is the reason why selecting the first raw in the table will display a blue border around the image.
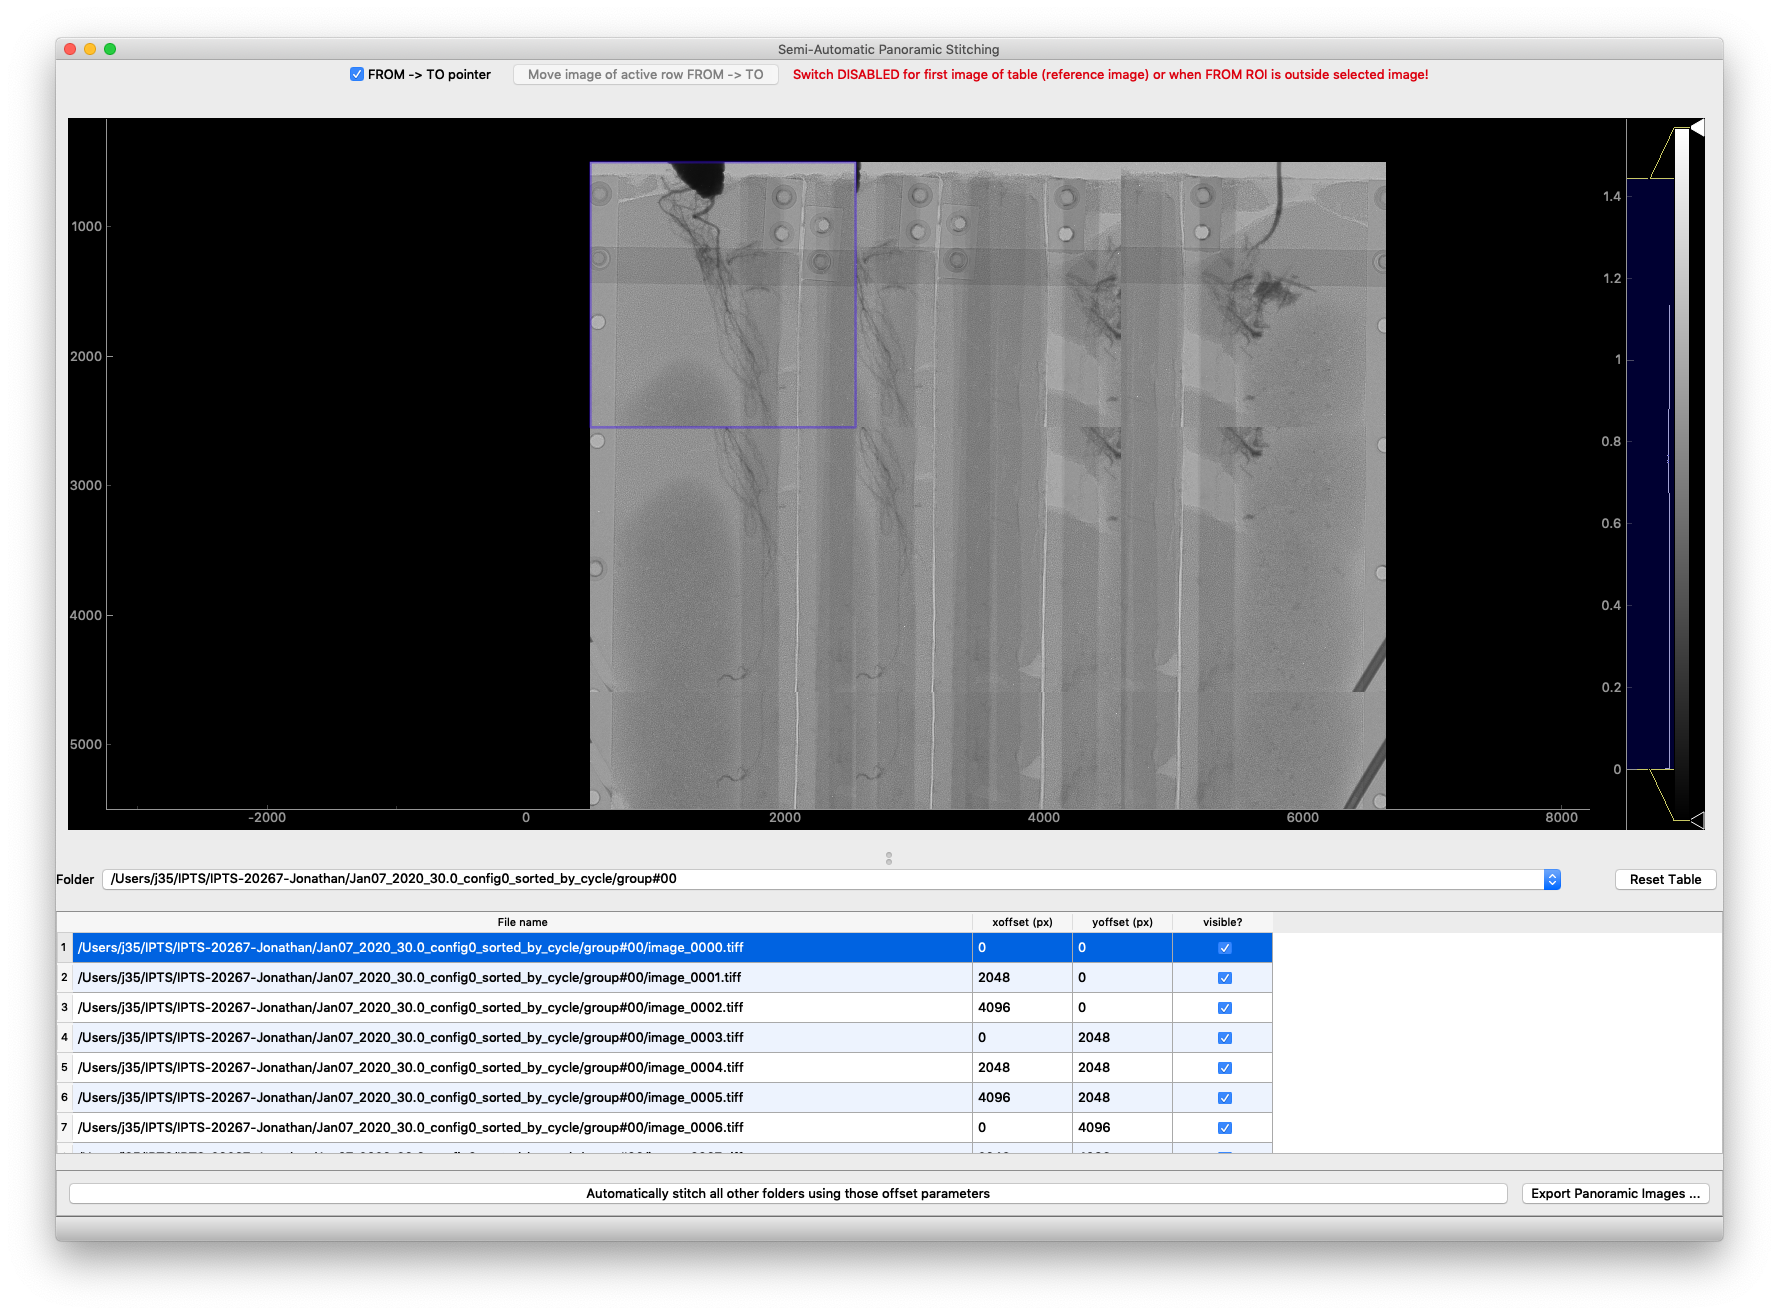
Any other row selected will display a red border around the image selected. You have three options to move those images.
- using the mouse
- using the manual offset button to jump by 1 or 5 pixels at a time
- entering offset values directly in the table
Using the Mouse
To activate the mouse mode, click the From -> To pointer switch at the top of the UI. This will brings a couple of target labels FROM and TO within the panoramic view. Simply move the FROM target within the image selected region, inside the red box, to a feature you recognized in the previous image stitching. Move the TO target to that same feature and then click Move image of active FROM -> TO to reposition that image.
the Move image of active row FROM ->TO button will be enabled only when the FROM target is within the image selected (surrounded by a red border).
The UI provides a horizontal and vertical profiler tool to help in the alignment of 2 images.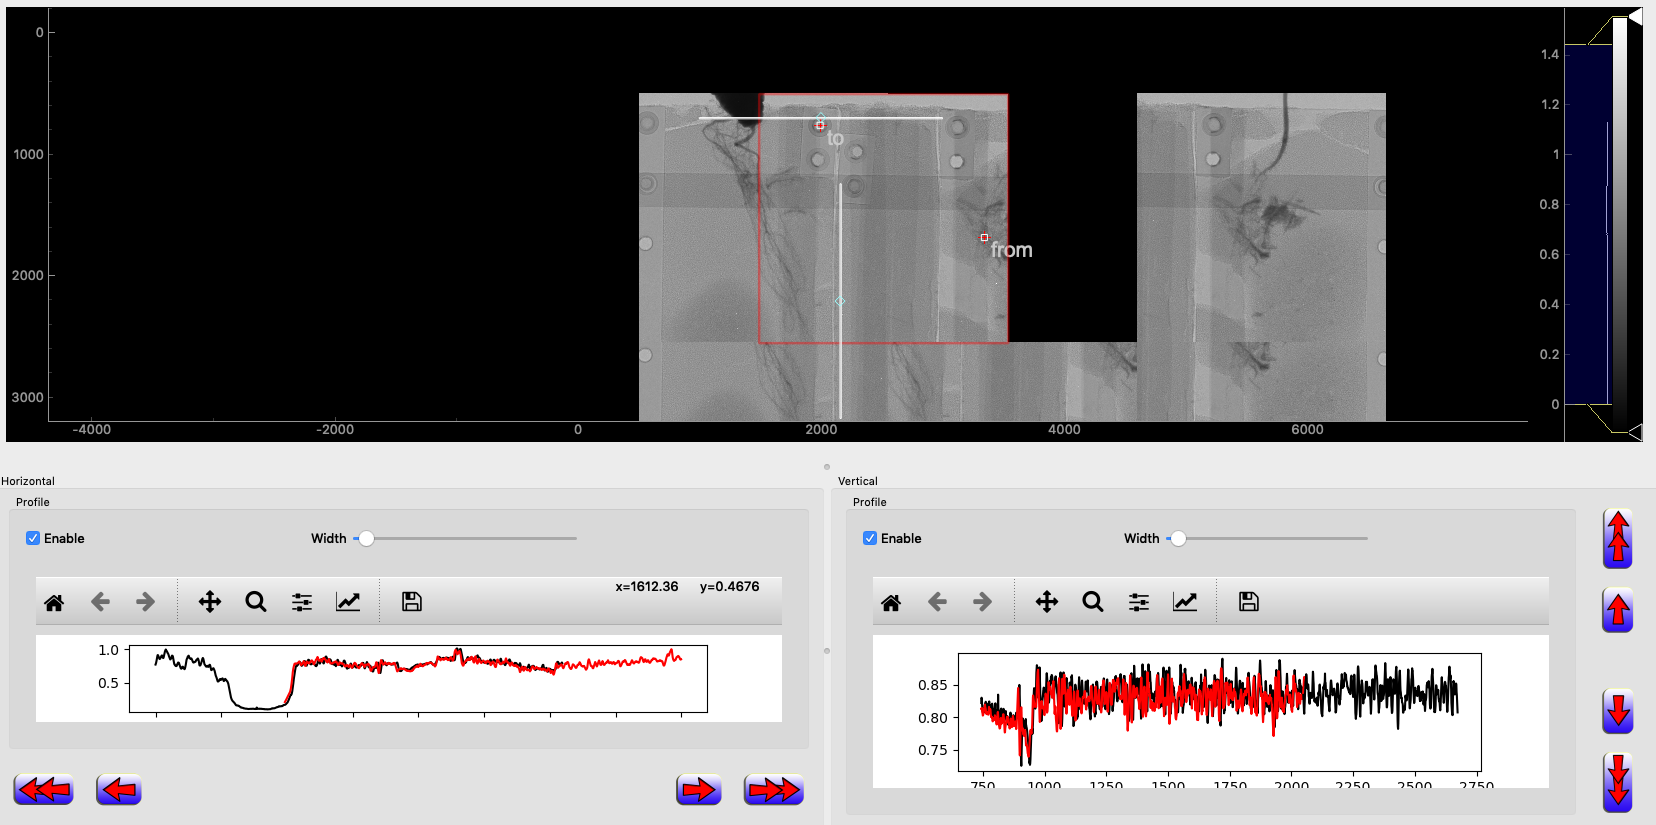 Feel free to move around the horizontal and vertical profilers, and resize them in length or width as illustrated here.
 The BLACK plot shows the profile from the reference image, the RED plot shows the profile of the working image.
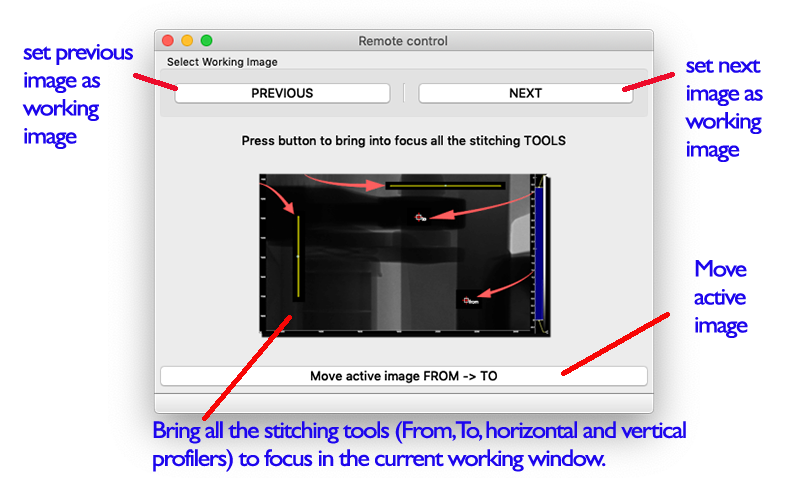 The latest version of the notebook provides a remote control that will speed up the alignment process. You can easily jump to the previous or next image to work on, and you can bring all the alignment tools (FROM and TO cursors, horizontal and vertical profilers) into the current window view. This allows you to use full benefit of your monitor size by only working on the image view.
Using table
You can also directly enter the xoffset or yoffset of any image, except the first one, within the table. Double click the field you want to edit to change the x or y offset.
A right click inside the table allows you to save, load or reset the content of the table.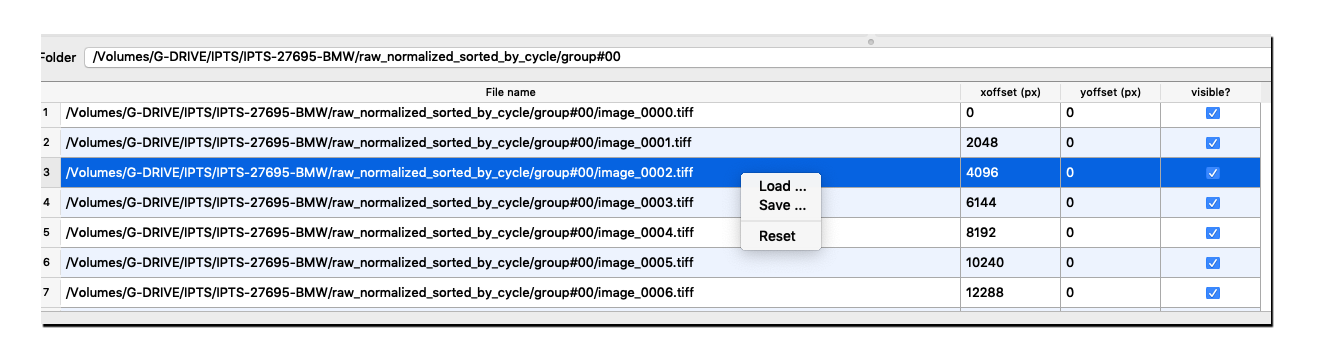
Step 2 – Repeat settings defined on all other folders
Once you have completely aligned all first images of the current folders, you can repeat the settings on all the other folders by clicking the Automatically stitch all other folders using those offset parameters button. The program will calculate for each image the coefficient x and y offset versus motor position and then will apply that coefficient to the new images. This rule of 3 allows a perfect horizontal and vertical position of the images. Once it’s done, simply browse through the folders to check the alignment of all the images.
Step 3 – Create all panoramic images
You need first to select the output location where the image will be created. A folder will be created based on the name of the input folder’s parent directory.
The final images are not created at this stage and only the position of each image is set. In the final step, the export will perform the stitching using the algorithm you will select.
Step 4 – Export all panoramic images
Click the bottom right button to export all the panoramic images.
A progress bar at the bottom will show you that the notebook is calculating the result of using various stitching algorithms on the current working set of images. Once it’s done, a dialog box will display those images side by side to allow you to pick the best one for your data set.
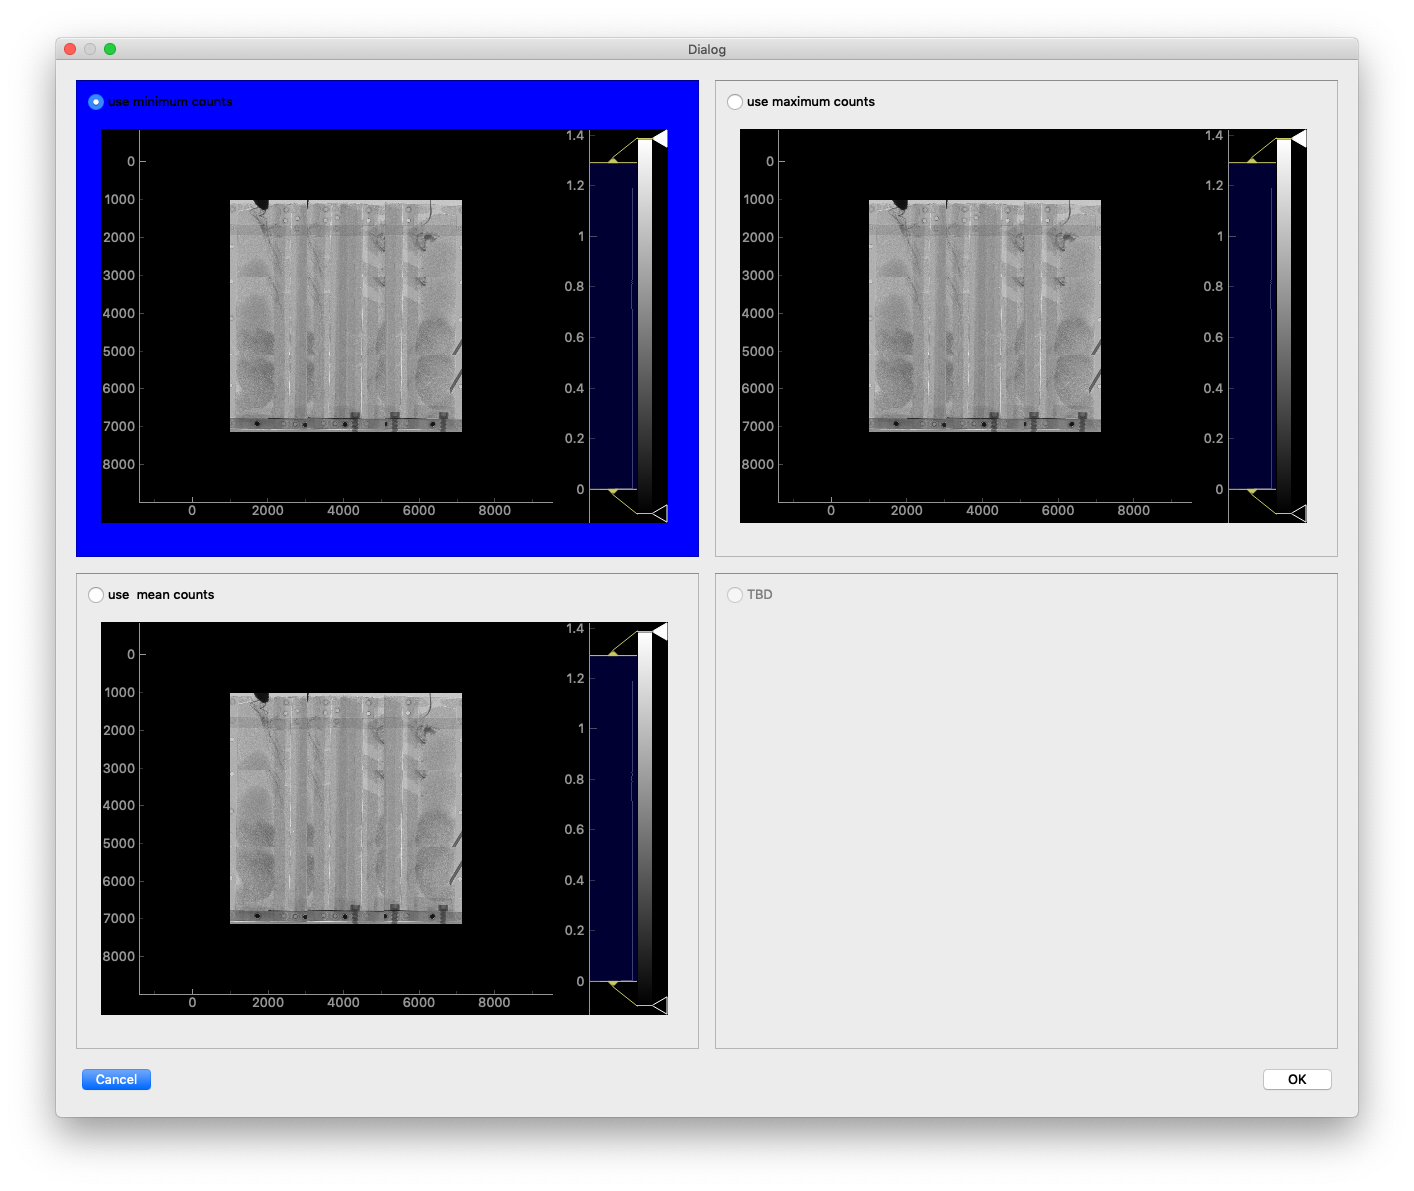
Feel free to zoom/pan within any of the images to compare the results
The 3 algorithms available for now are:
- use minimum counts
- use maximum counts
- use mean counts
Using minimum counts will take the pixel of lower intensity in the overlap region
Using maximum counts will take the pixel of higher intensity
Use mean counts will take the average of the two pixels
Once you click OK, you will need to select where your want to create the output folder. The name of the folder that the program is going to create will be based on the input folder name and the name of the algorithm selected.
For example:
- top parent folder: raw_normalized_sorted_by_cycle
- the algorithm selected: minimum counts
- output folder will be raw_normalized_sorted_by_cycle_panoramic_minimum_counts
