Overlay images
Description
Tutorial
Select your IPTS
Need help using the IPTS selector?
High-resolution images
Use the file selection tool to select the high-resolution images you want to use.
Low-resolution images
Repeat the same process for low-resolution images.
Launching the interface
The next cell will bring the main UI to life.
Use the splitters to resize any of the windows.
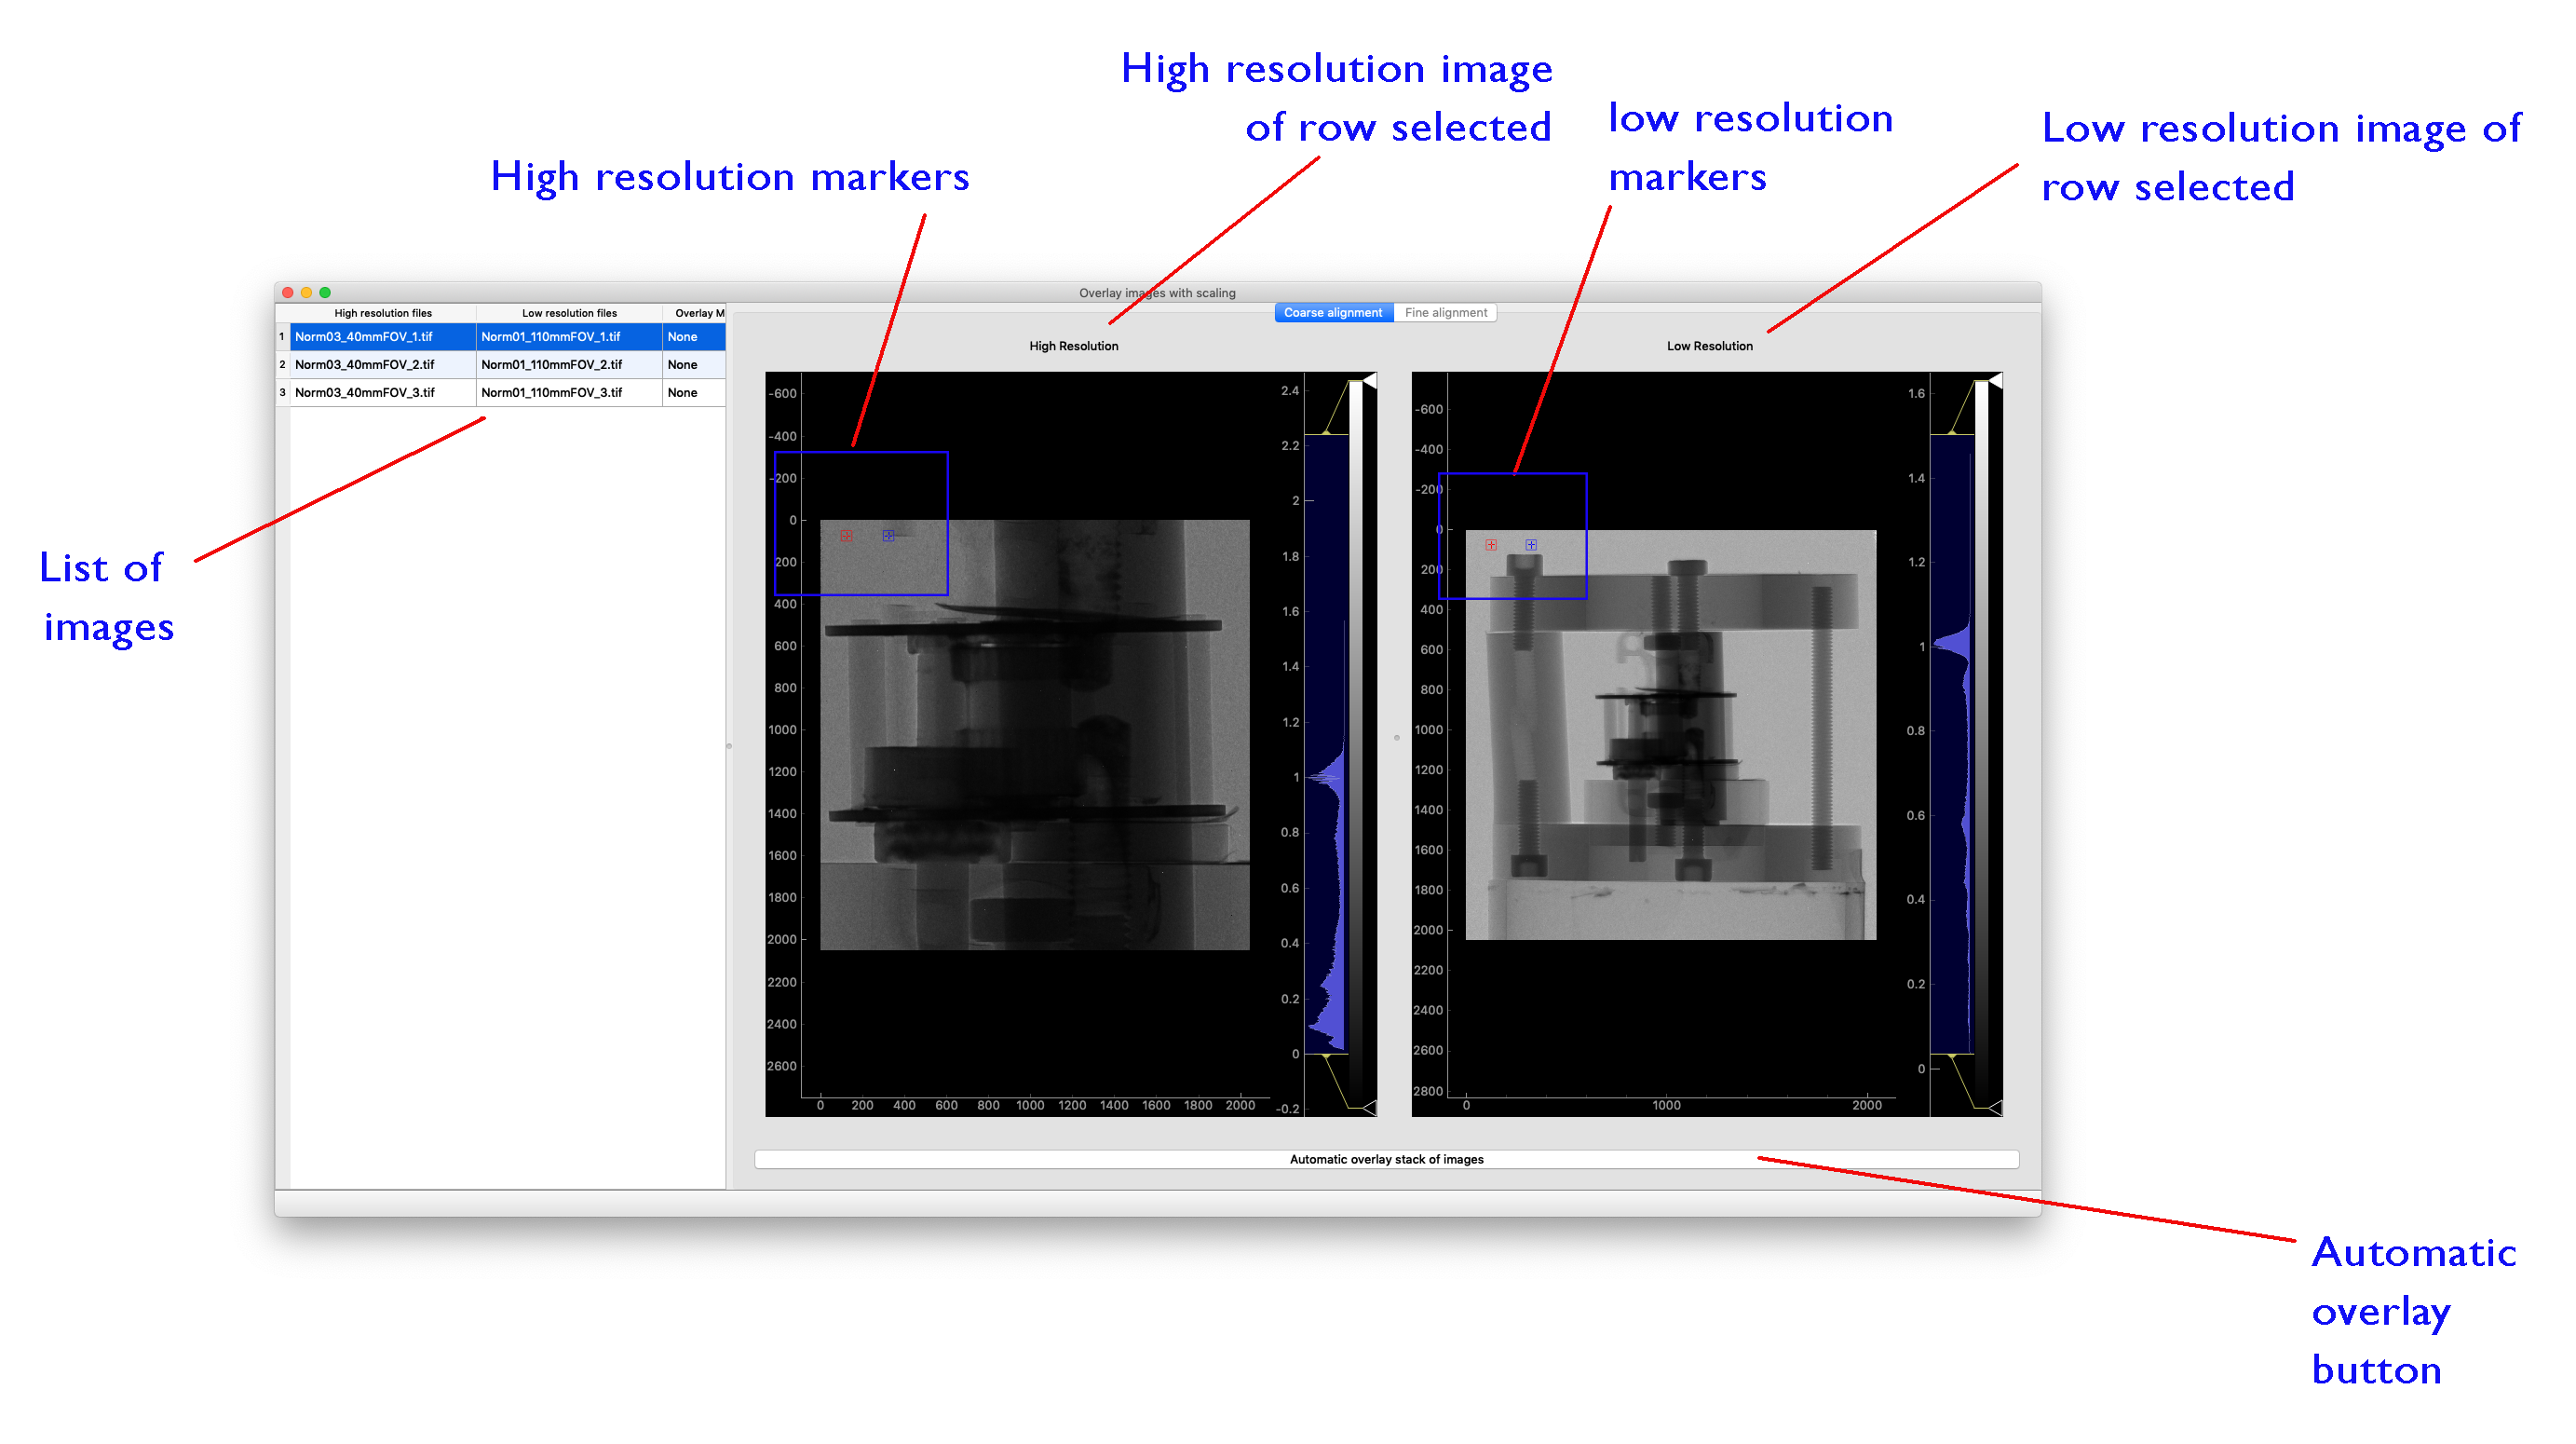
The first tab will allows you:
- to roughly rescale the low-resolution images to fit the pixel size of the high-resolution images
- place the high-resolution images in the right place inside the low-resolution images
Step1
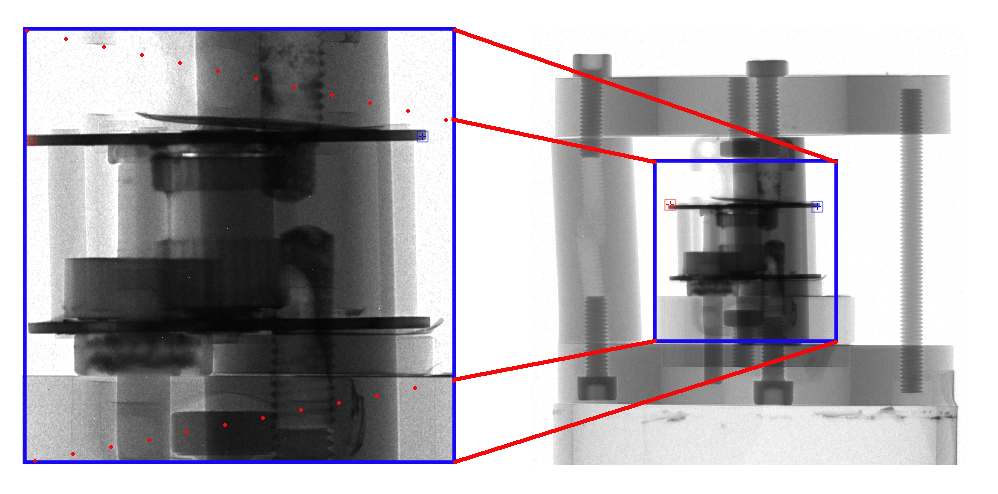
Using the RED and BLUE markers. The goal is to place the RED markers at the corresponding spot in the high-resolution image and the low-resolution image. Repeat it for the BLUE markers.
Make sure you use the mouse to facilitate the selection by Zooming (wheel) or panning (left and drag click).
Step 2
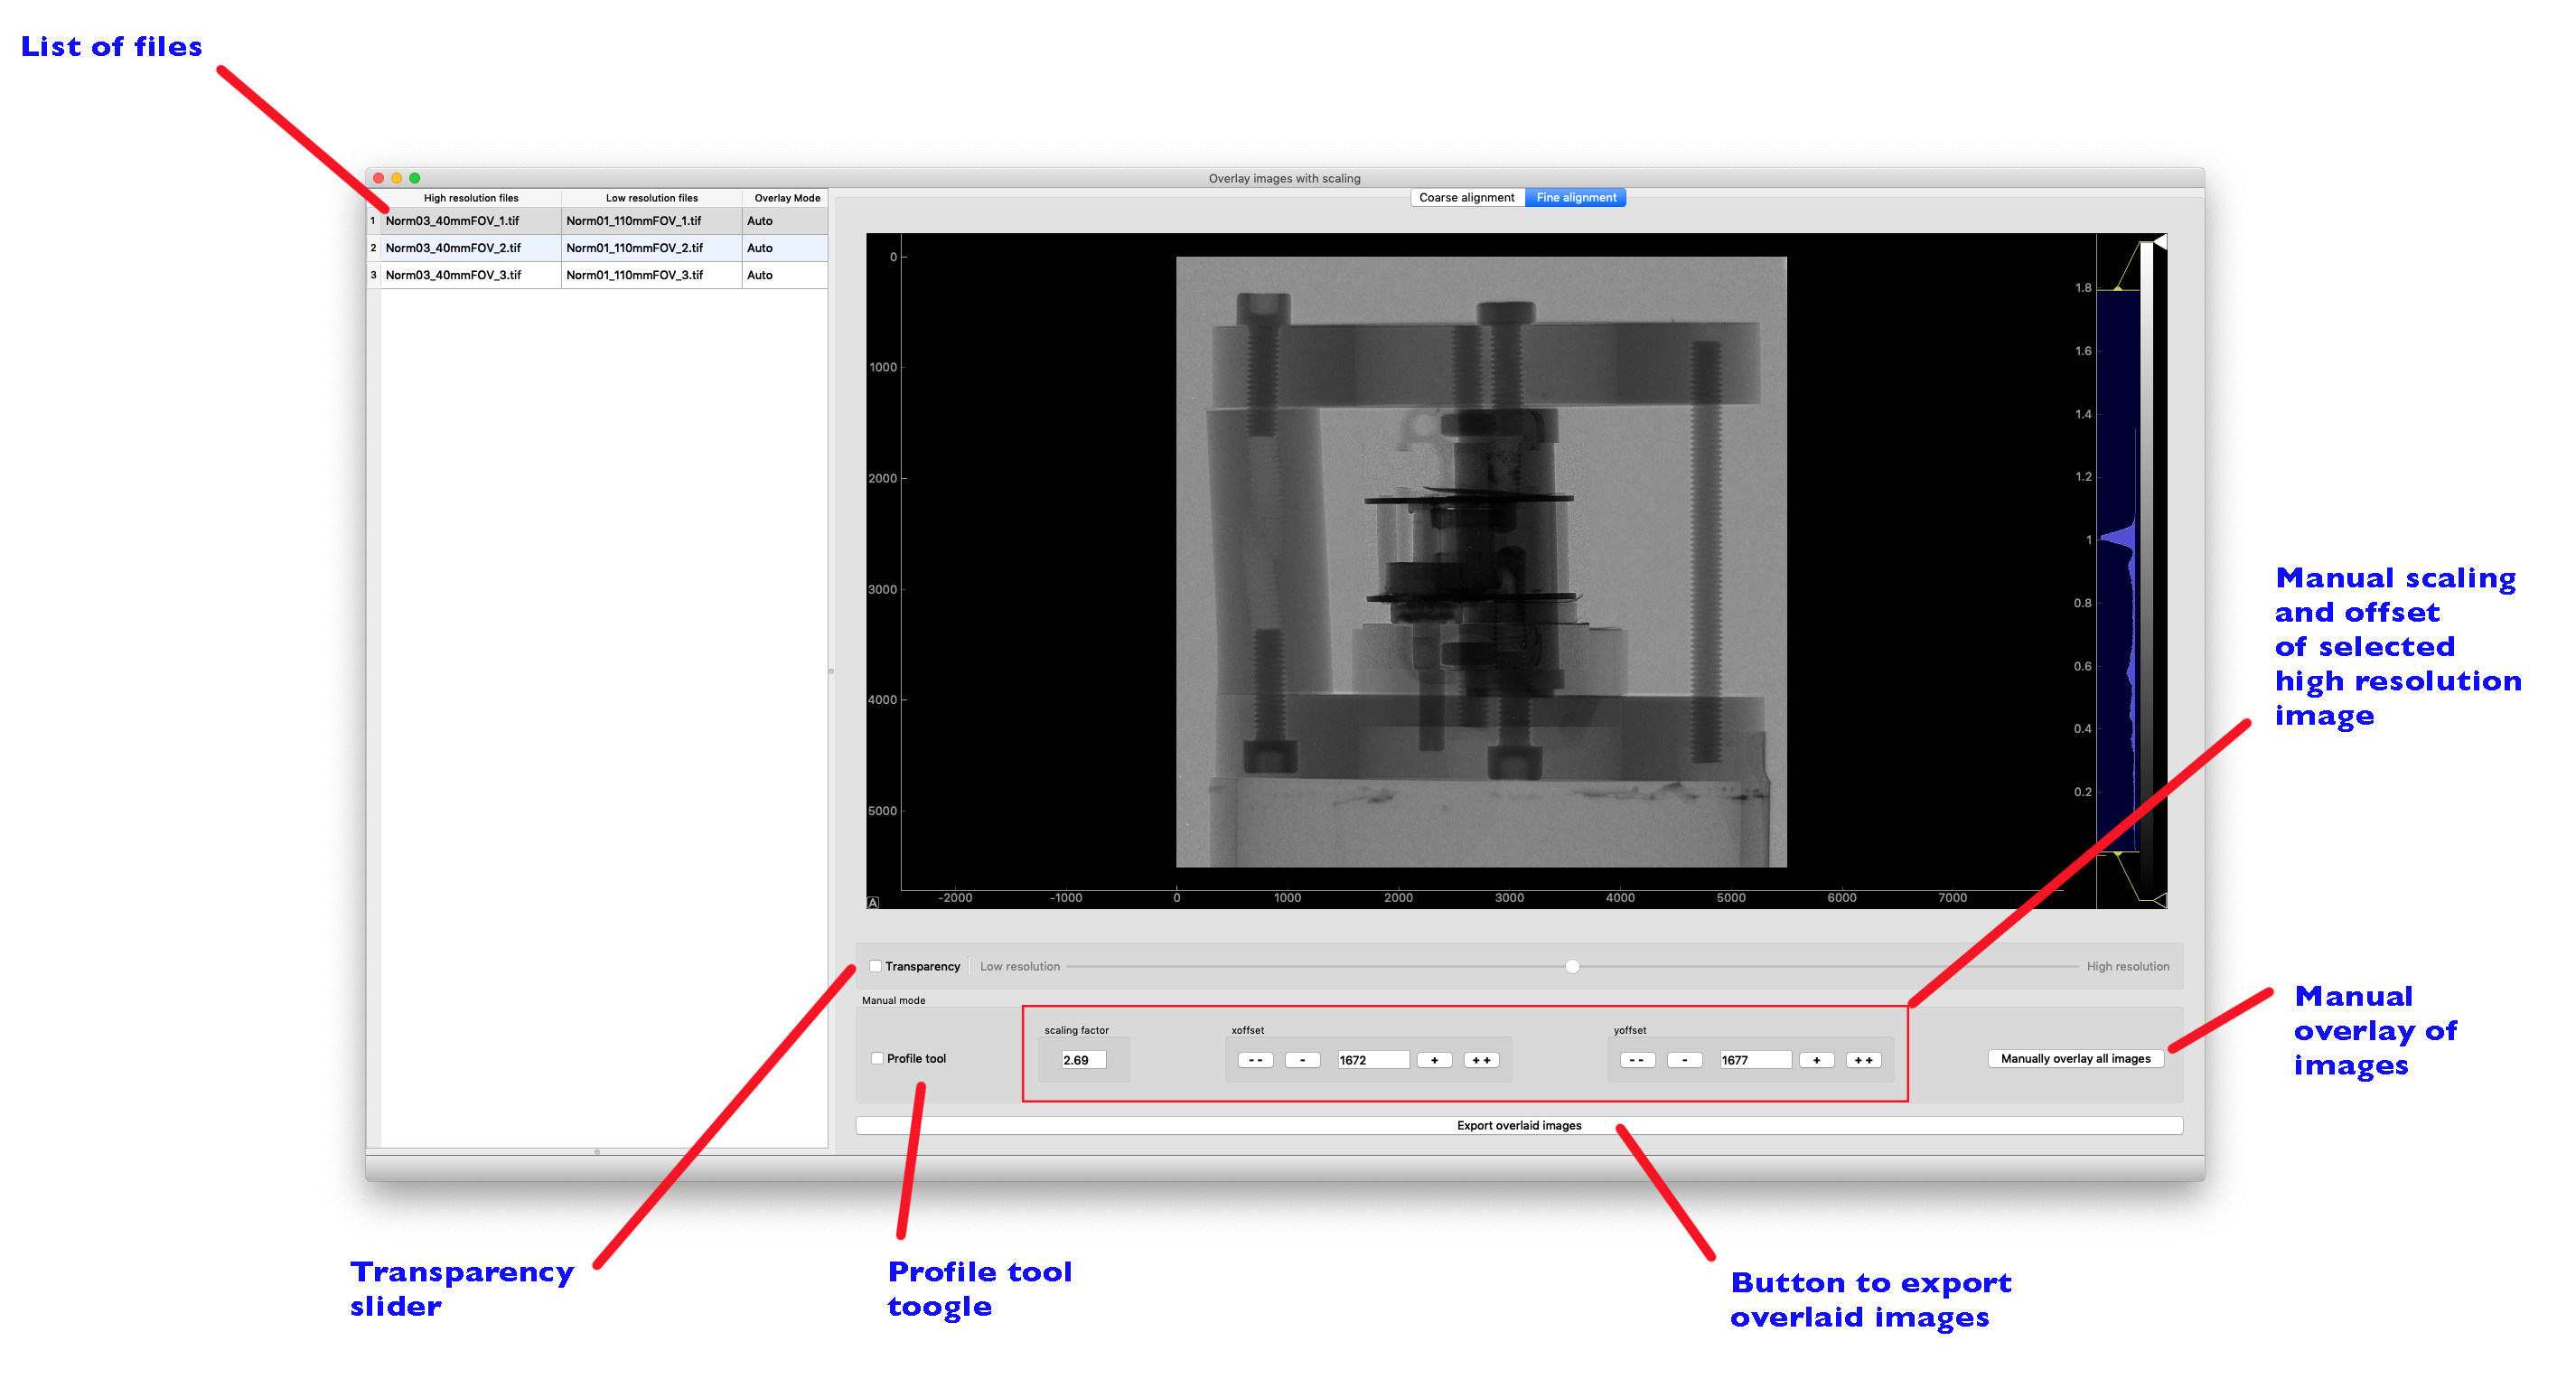
The second step allows you to improve the alignment of the selected high resolution image and apply that changes (scaling factor, xoffset and yoffset) to all the other images.
A couple of tools are available to help you position the images, the profiler, and the transparency tools.
Manual scaling, xoffset and yoffset
It’s possible to manually define the scaling factor, the xoffset, and the yoffset position of the currently selected high and low-resolution images. Just enter the new value and hit ENTER to validate the new value. You can also manually move the high-resolution image by 1 or 5 pixels, either way, using the -, – -, +, and + + buttons.
As soon as the scaling factor, xoffset and yoffset values differ from the values calculated by the automatic mode, the overlay mode in the table of the list of files will display Manual.
Profiler tool
Turn on the profiler tool to get a live profile plot of the vertical and horizontal high-resolution and low-resolution profiles around the cursor position. This will help overlay the two images.
Transparency
Using the transparency feature allows seeing “through” the high-resolution image, and the low resolution to help the overlay.
![]()
Once you are satisfied with the overlay of the “working” images, click the Manually overlay all images in order to apply that settings to all the images. Once all the images have been overlaid, the export overlaid images button becomes available.
Export the final images
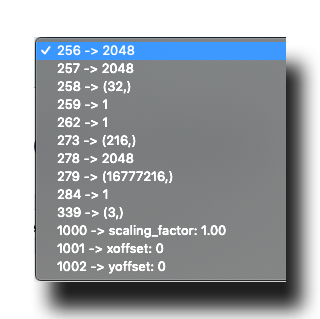
Click the Export overlaid images button to export the overlaid images. Each TIFF image created will have a few new metadata info:
- scaling factor
- xoffset
- yoffset