Radial profile
Description
This notebook allows you to display and export the radial profile of a set of images. Radial profile means that, after defining the center of your profile region, the closest pixel to the center will produce the first data point. Then the next ones will produce the second data point (average counts over the set of each pixel).
Confusing?
Well, the following drawings should help you understand how that works.
Full circle
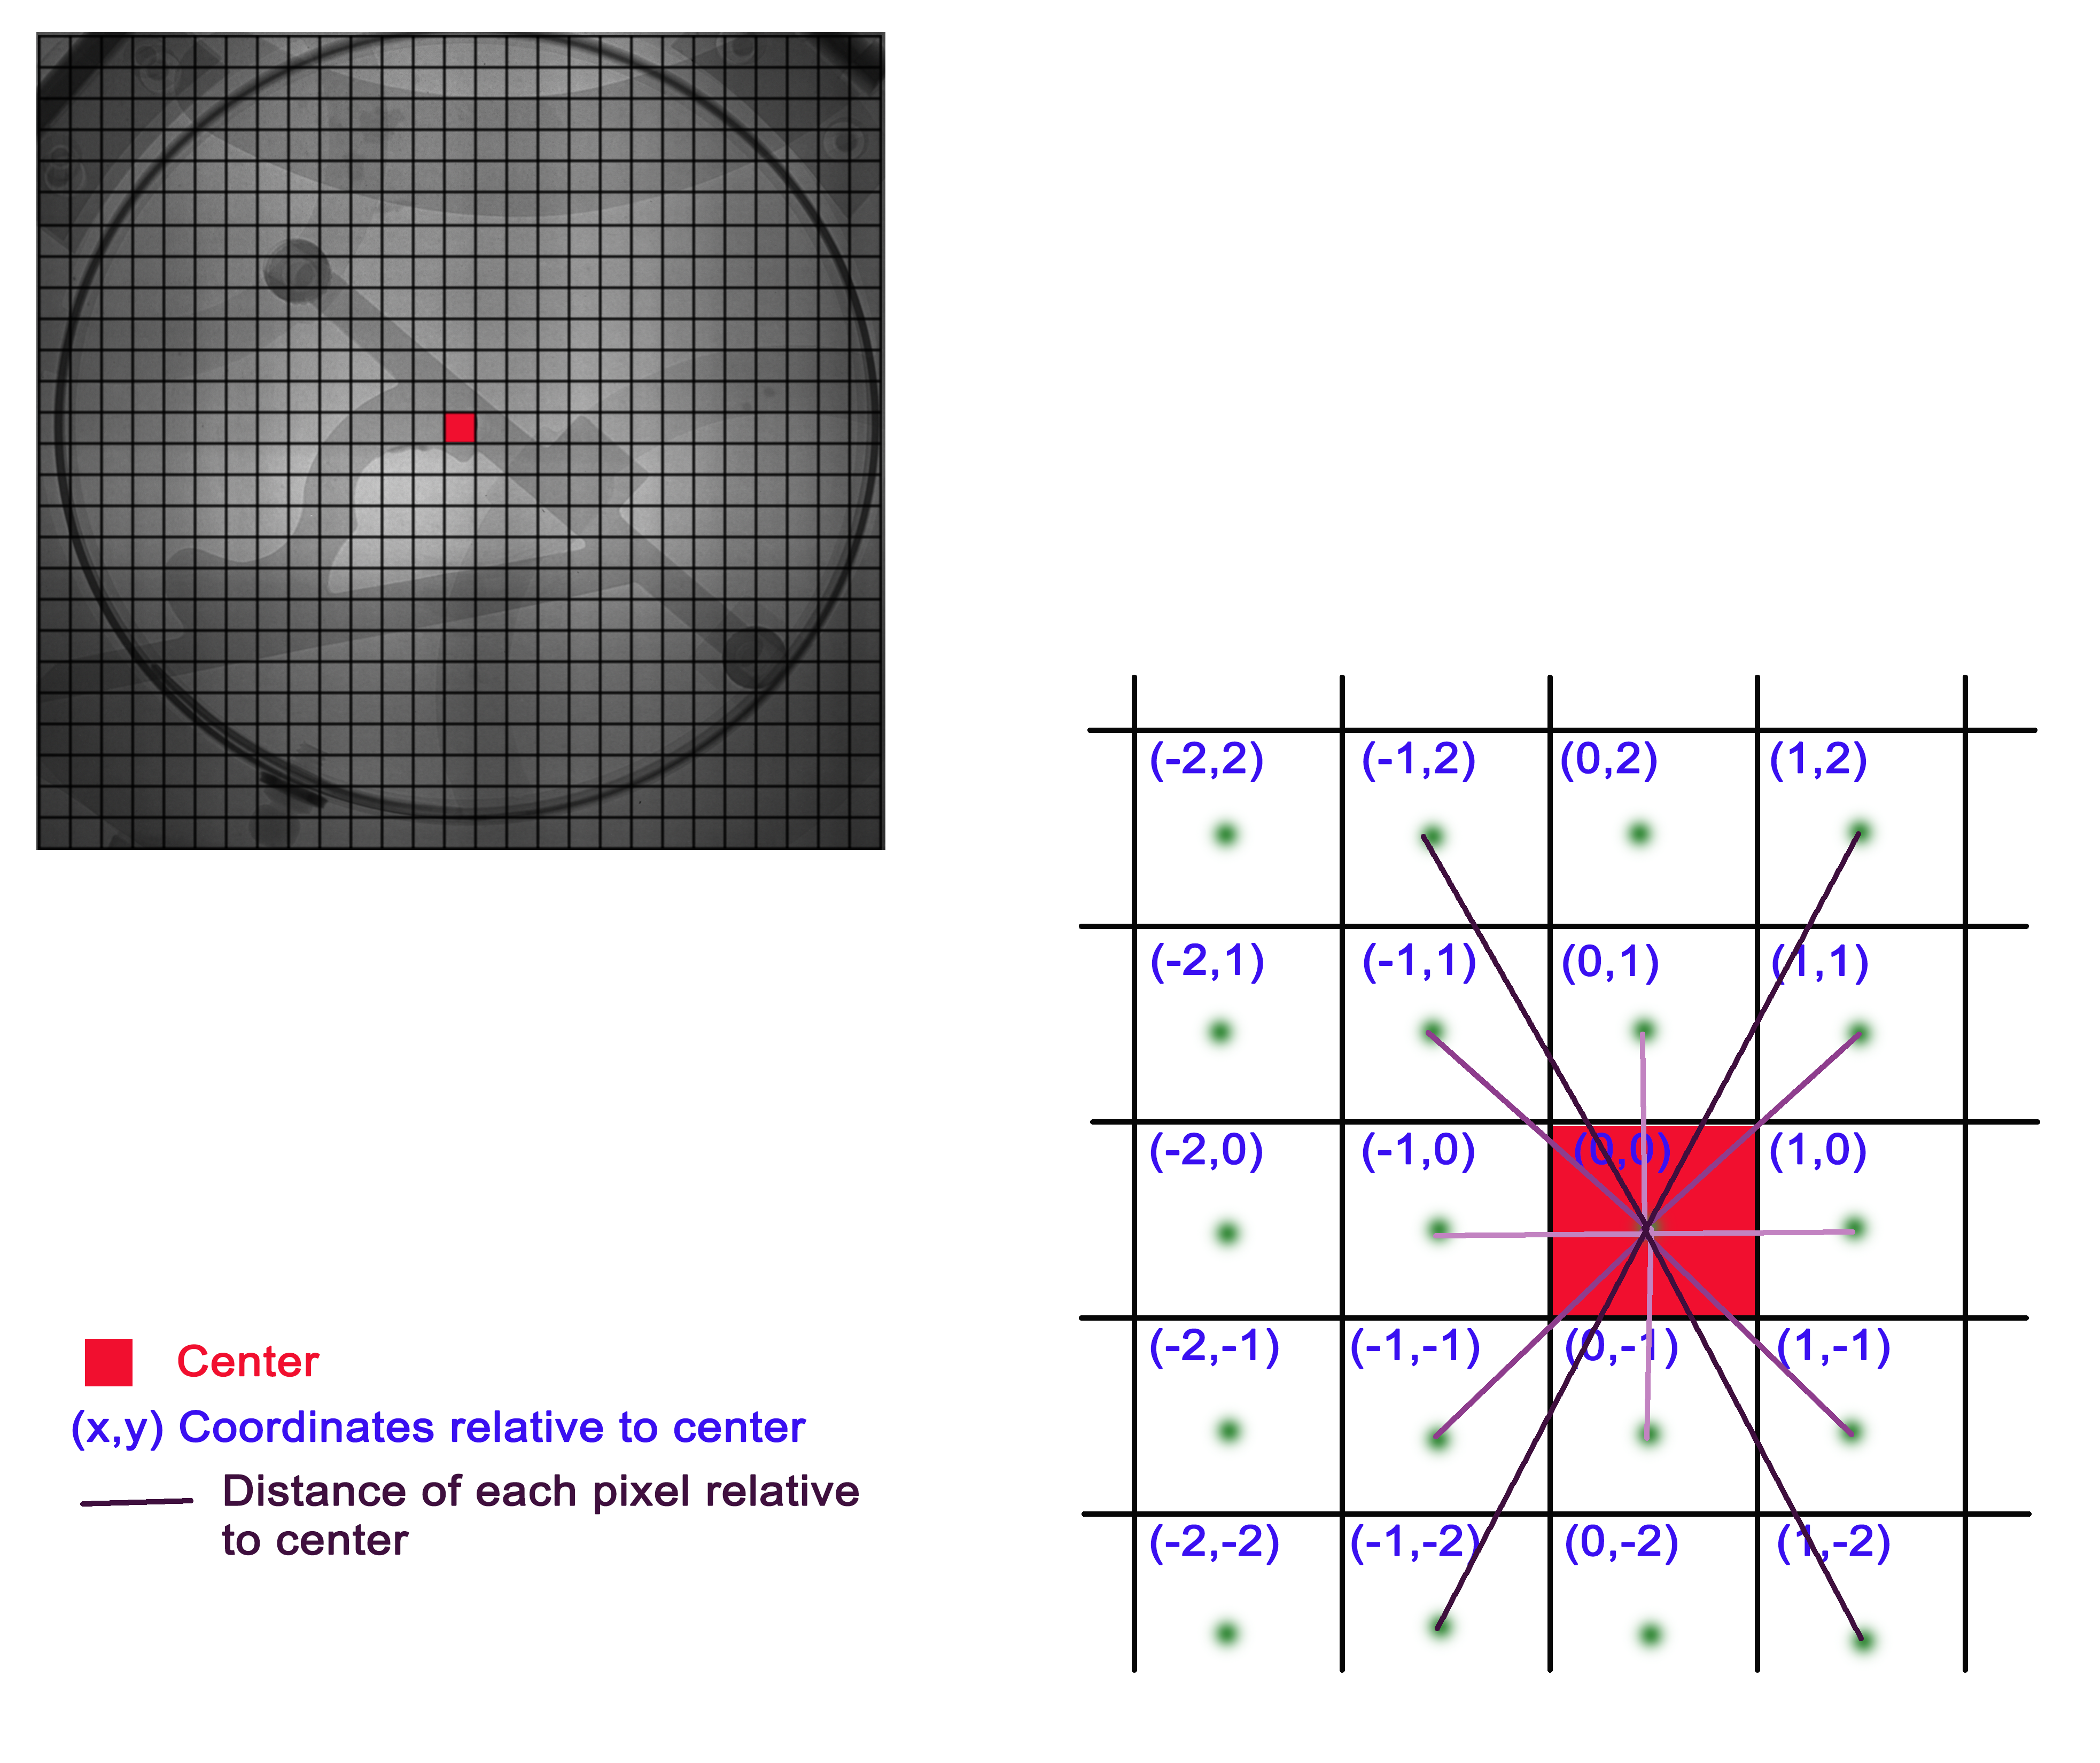
- Step1: The user defined the center of the profile (Red pixel in this example)
- Step2: User defined the sector to use (in this case, we used the entire sector 0 -> 360degrees)
- The program then calculates the position of each pixel relative to the new center defined
- Program order the pixels by their distance relative to the center. All the pixels at the same distance from the center will have their counts averaged. Profile of Counts vs pixel index position is then calculated.

Sector
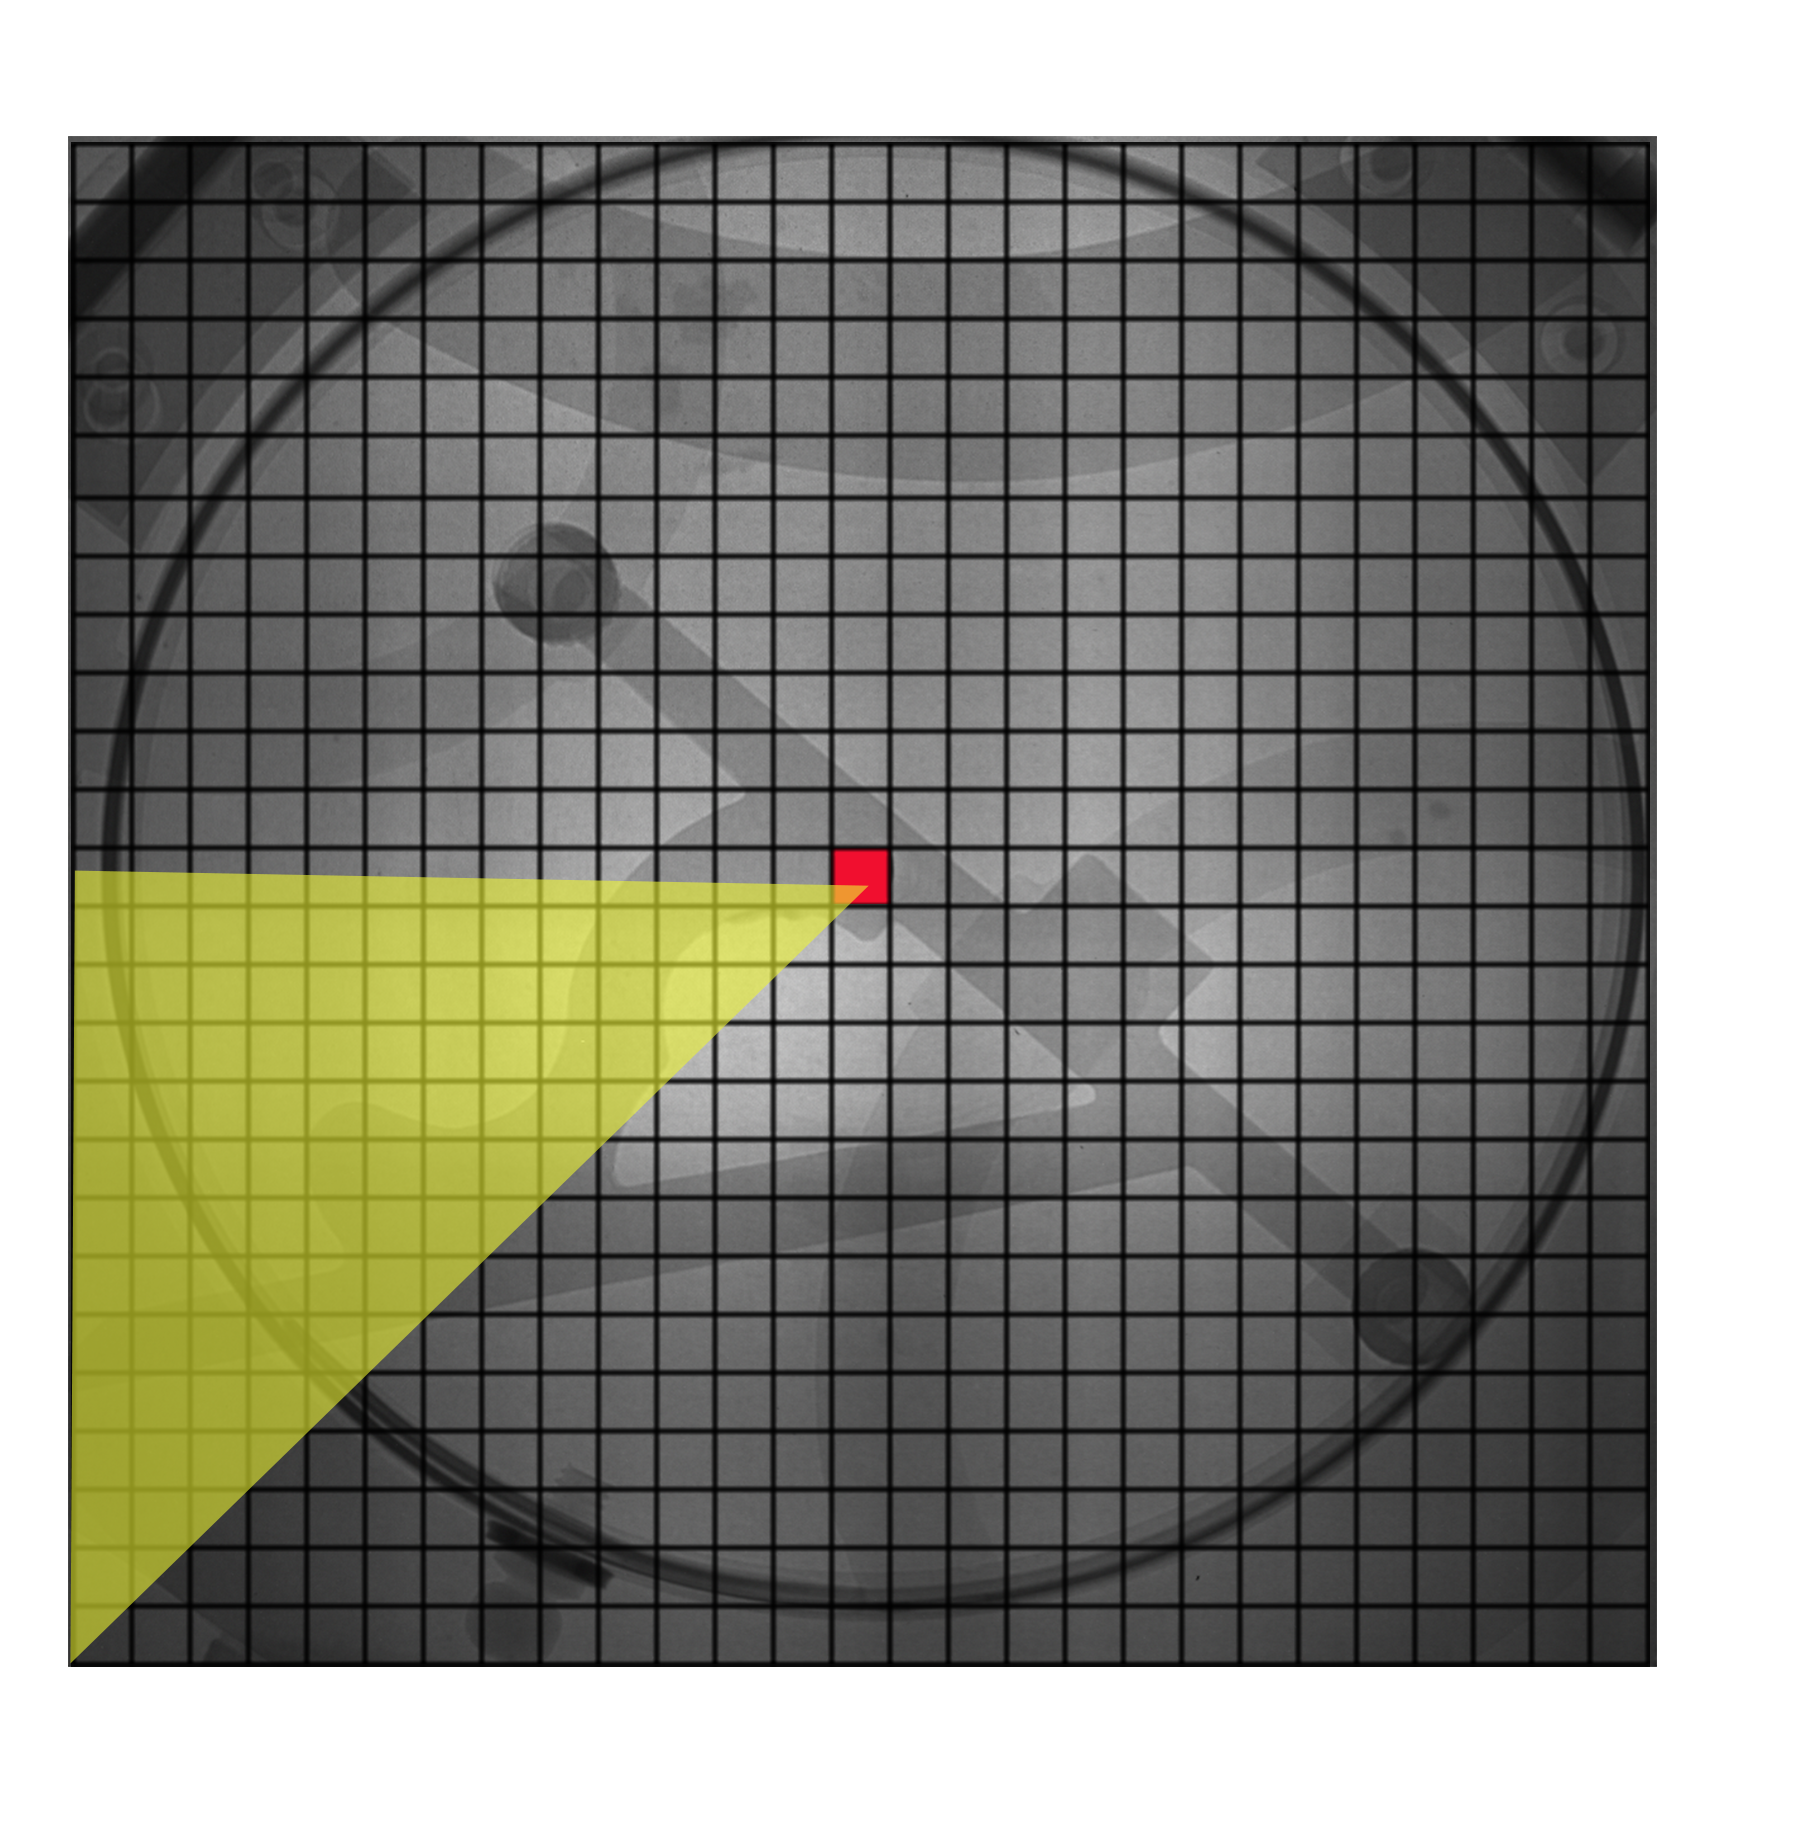
- Step1: The user-defined the center of the profile (Red pixel in this example)
- Step2: The user-defined the sector to use
- The program keeps only the pixel that is within the sector defined
- The program then calculates the position of each pixel relative to the new center defined
- Program order the pixels by their distance relative to the center. All the pixels at the same distance from the center will have their counts averaged. Profile of Counts vs pixel index position is then calculated.
Tutorial
Select your IPTS
Need help using the IPTS selector?
Select images to process
Using the file selection tool, select the images you want to process using the File Selector. Once you click the Select button, the time stamp and the images will be automatically loaded. Wait for the progress bar to be done.
UI presentation
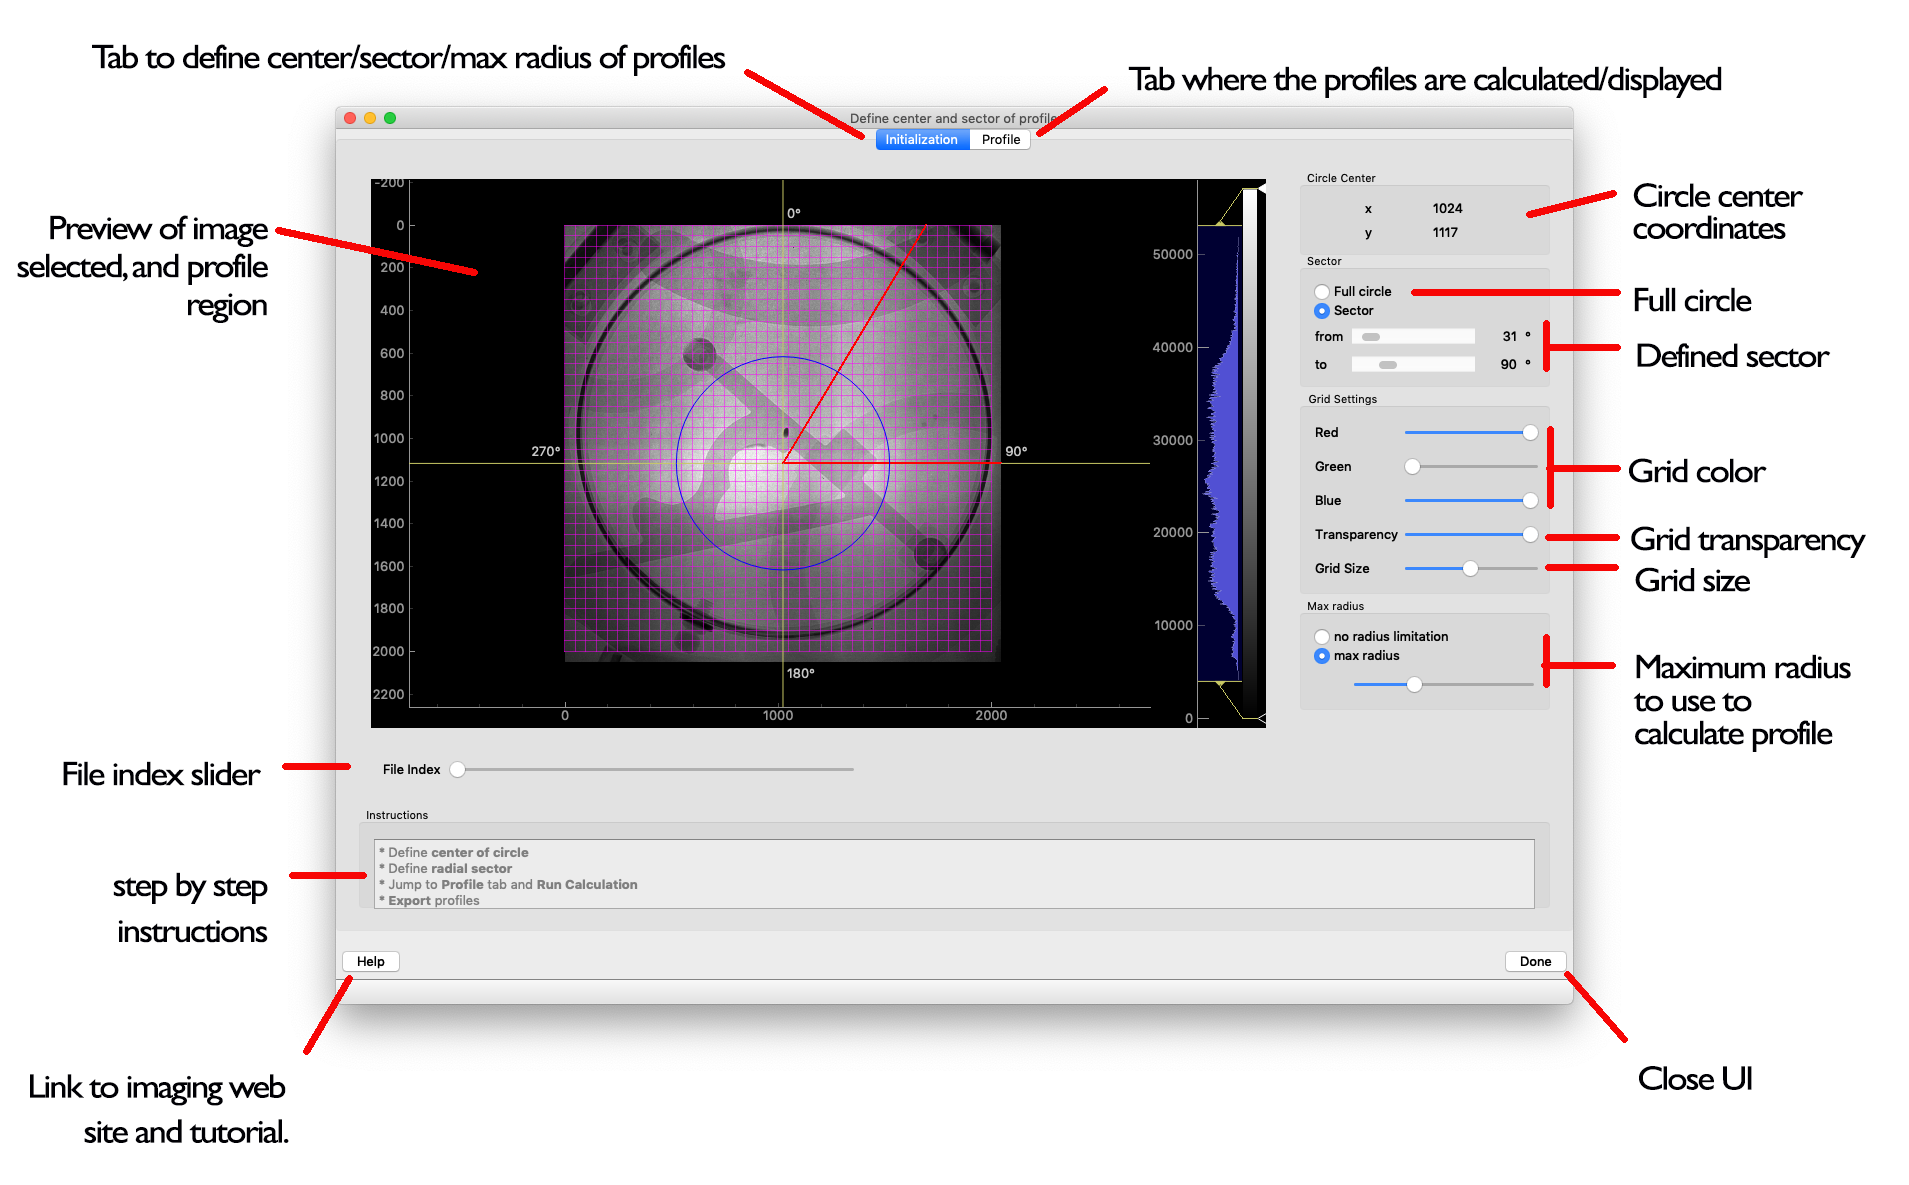
After running the launch User Interface cell, the following GUI pops up.
Selection of the sector center
Using the mouse, click the vertical and then horizontal lines on the image window to define the center of the sector.

Selection of the sector range

Grid settings
It’s possible to change the settings of the grid (useful when the color of the image and grid are too close).
Maximum radius
By default, the entire range of pixels from the center to the side of the image is used. But it’s possible to narrow down that range to a given number of pixels using that tool. Turn on the Max radius option. Play with the slider to set the size of the pixel range.
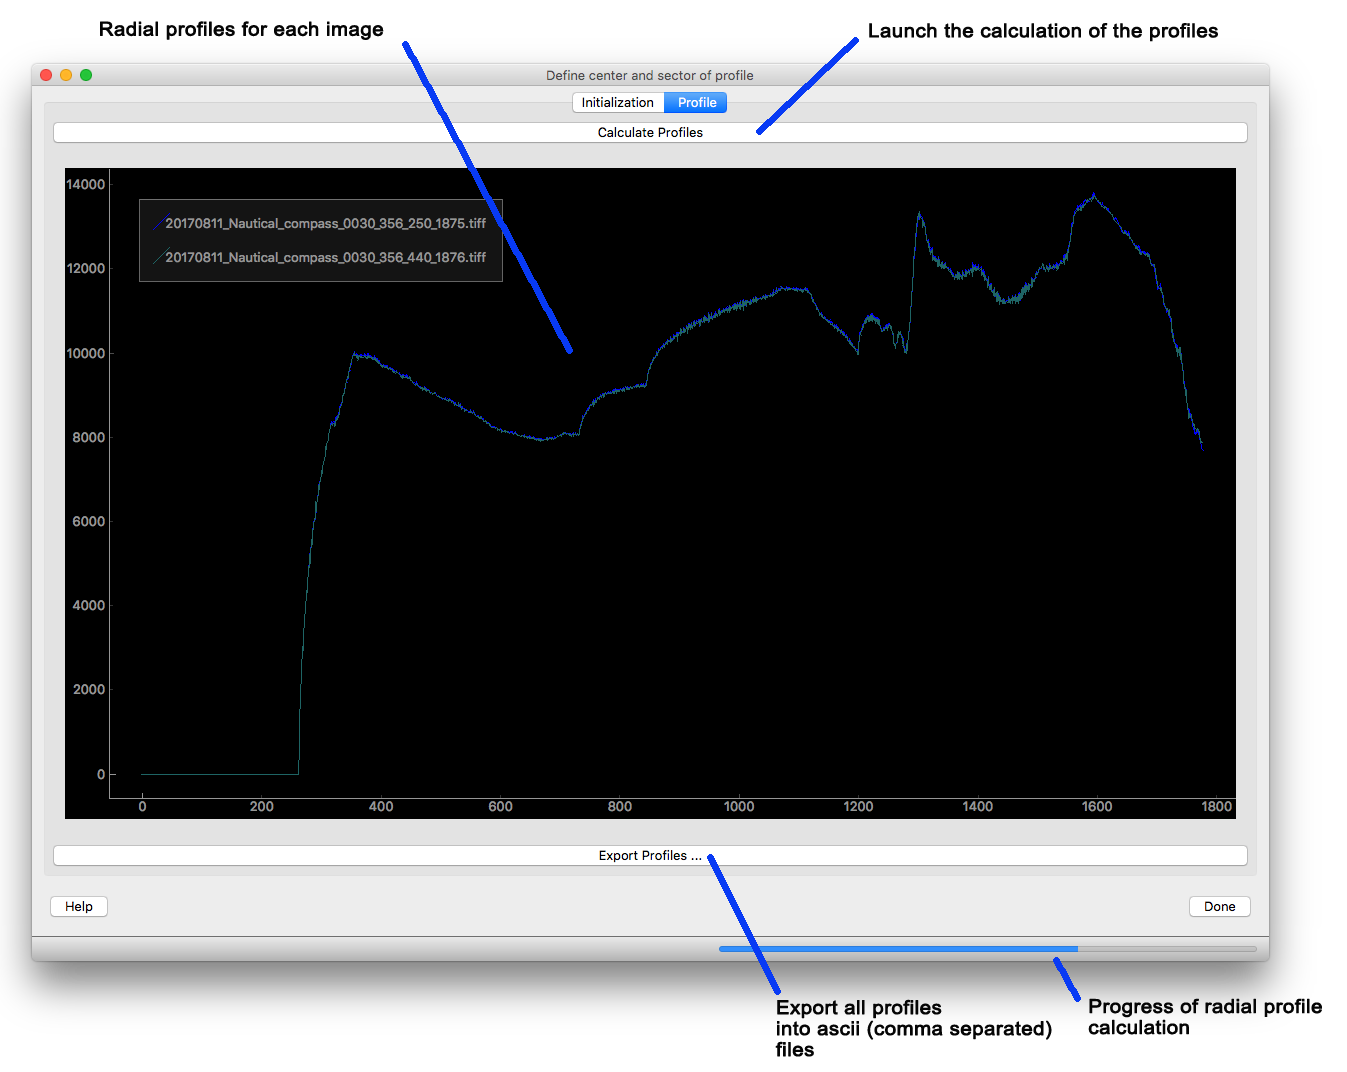
Calculate the radial profiles
Jump to the Profile tab and click the Calculate Profiles to calculate the radial profile of each image loaded. All those profiles will be displayed in the same plot below.
Export profiles
Once the calculation of all profiles has been performed, the Export Profiles button becomes available. Click the Export Profiles … and select where you want to create the ASCII files.
File name convention
The ASCII files creates will have the names bases such as
<name_of_image>_profile_c_x<x_center>_y<y_center>angle<from_angle_in_deg>to<to_angle_in_deg>.txt
where:
- name_of_image: is the name of the source image without the extension (20170811_Nautical_compass_0030_356_250_1875)
- x_center: the x axis position of the center (1024.0)
- y_center: the y axis position of the center (1024.0)
- from_angle_in_deg: starting sector angle in degrees (24.0)
- to_angle_in_deg: ending sector angle in degrees (137.0)
giving a name of
20170811_Nautical_compass_0030_356_250_1875_profile_c_x1024.0_y1024.0_angle_24.0_to_137.0.txt
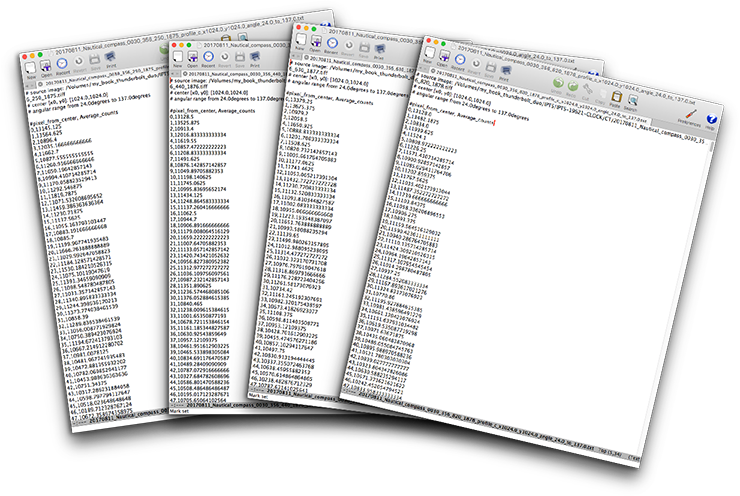
File format
Each ASCII file produced starts with the following metadata.