Rotate and crop images
Description
You will use this notebook if you need to crop and/or rotate a set of images.
The application will ask you to select the images (FITS or TIFF) you want to modify. Then a User Interface (UI) will allow you to define the cropping region as well as the rotation angle to apply to the images. You will be able to browse through the images to check the result and then create the transformed images before exporting them to a new output folder as TIFF images.

Tutorial
Select your IPTS
Need help using the IPTS selector?
Select your images
Using the file selection tool, select the images you want to work with.
Once selected, your images will be automatically loaded.
Crop and/or rotate your images
This is where you will apply the correction to your images.
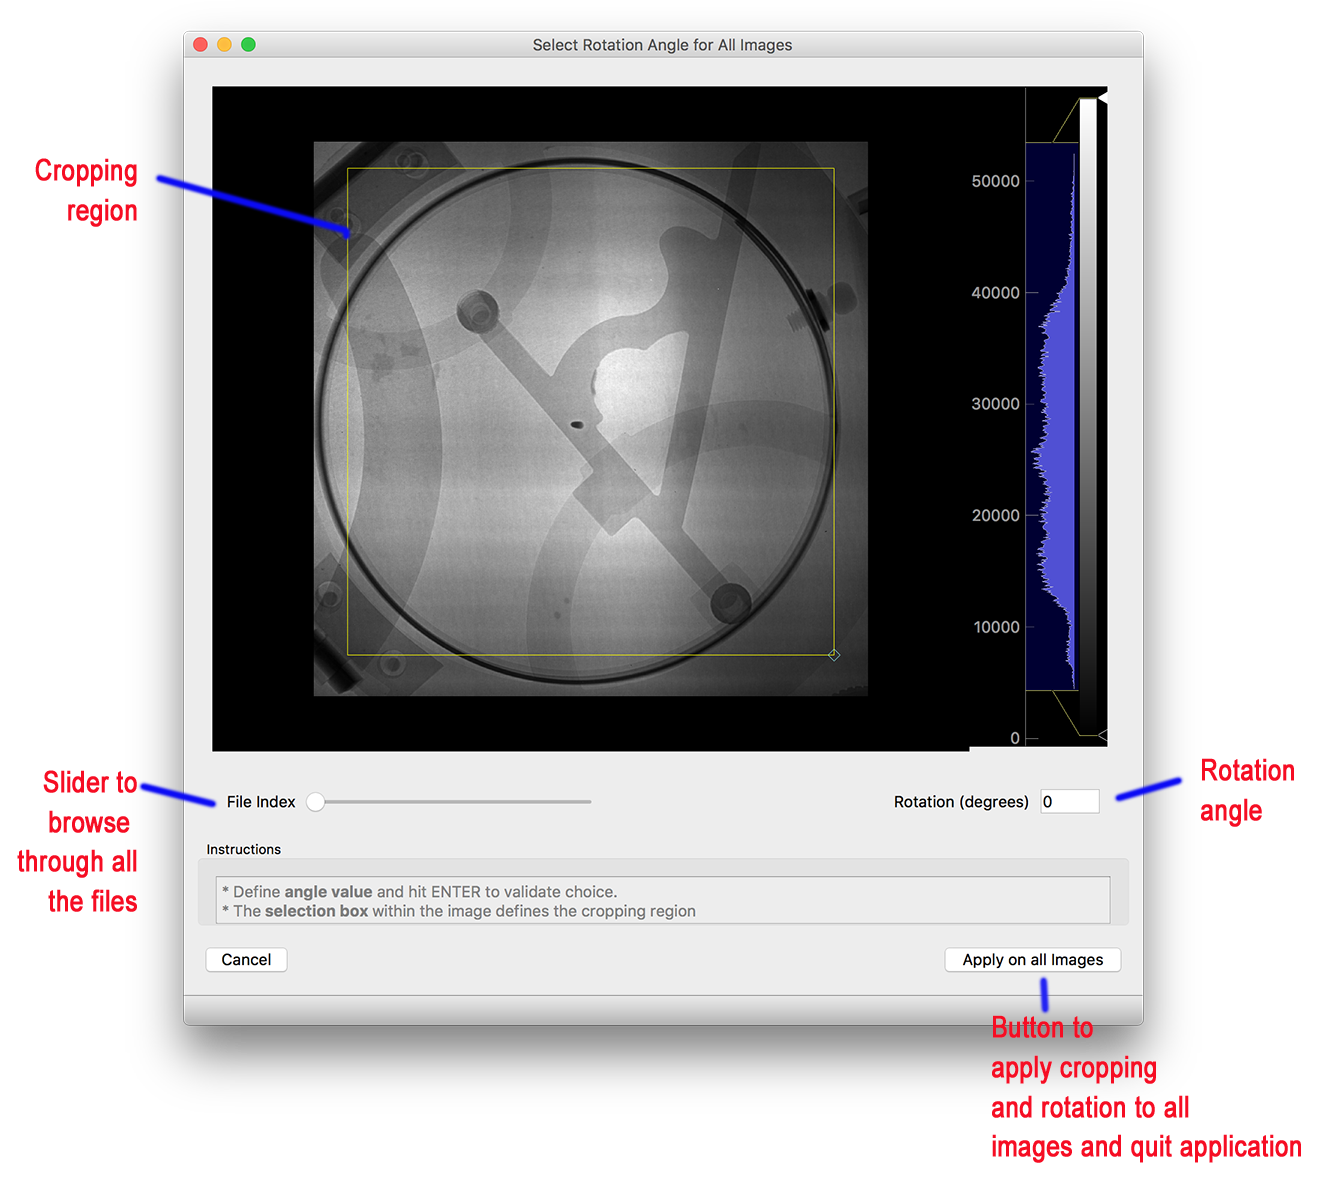
How to crop the images
- move the box around by clicking one of the edges and without releasing the mouse move the box to the new location
- and resize the box by clicking the bottom right corner and dragging it to the new size.
How to rotate the images
Simply by entering the angle value in the text field. The angle is using the geometrical convention, with a counterclockwise rotation direction.
Apply changes to all images
By clicking the apply on all images button, you will apply that correction to all images and quit this UI
Export images
Using the folder selection tool,
select where you want the output images to be created.
The program will automatically create a folder based on the rotation angle you defined
For example:
A folder named rotated_0.5deg is created when the angle is 0.5 degrees.
