Table of contents
Description
The top part of the notebook gives a quick way to access the notebooks.
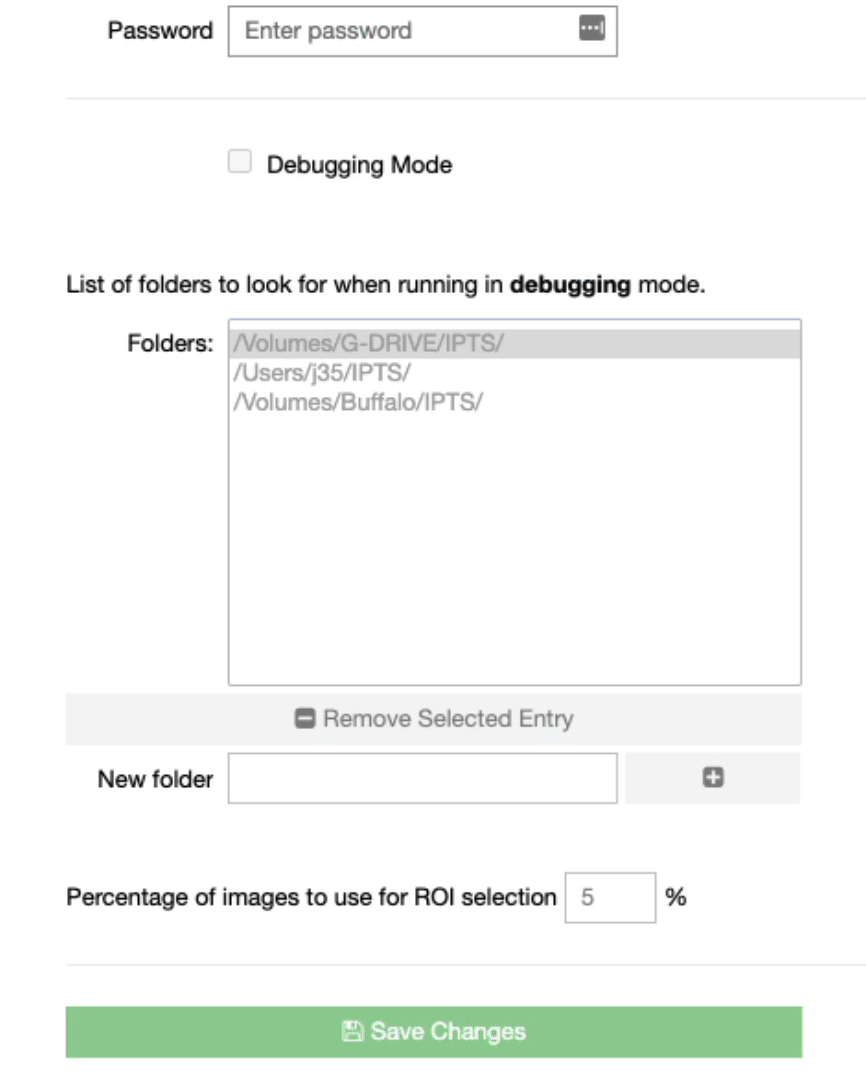
The bottom part allows super users (who know the secret access code) to edit the configuration file and change
- turn on and off debugging mode
- list folders to look for when working in debugging mode
- defined the percentage of images to use when using the ROI selection tool
Tutorial
Superuser
Enter the secret code to enable all the widgets. To get this code, please contact Jean Bilheux.
Debugging mode
Once activated, the notebooks won’t start looking at the usual file structure found on our analysis machine (/HFIR/CG1D, /SNS/SNAP, /SNS/VENUS), but instead at the list of folders provided in the following widgets. If the first folder can be found, this folder will be used as the default entry point of any file dialog box. Otherwise, it moves to the next one and so on.
List of folders
It’s possible to remove folders from the list or add new ones using the widgets under the selection tool. To add a new folder, define the folder in the New folder field and click +. The folder is added to the list only if the folder path exists in the current OS.
Percentage of images to use
In a few notebooks, such as the manual_normalization and automatic_normalization notebooks, you may need to select a region of interest in the background of the sample data set. Instead of loading the entire stack of images provided, the program uses a percentage, represented by this number here, of the entire stack. Only that percentage of images will be combined, using the mean, and used as an integrated images to facilitate the ROI selection. Those images will be chosen randomly.
Save changes
Click the Save Changes button to validate and record your changes.
If you are working from the analysis machine, those changes will be reset next time you restart the notebooks from the shortcut menu button.
