How to setup MARS auto-reconstruction
In order to access the user interface that will allow you to turn on/off the auto-reconstruction, and set it up:
- jump to the analyze machine
- open a terminal
- enter /SNS/CG1D/shared/autoreduce/start_autoreconstruction
This will launch the following user interface
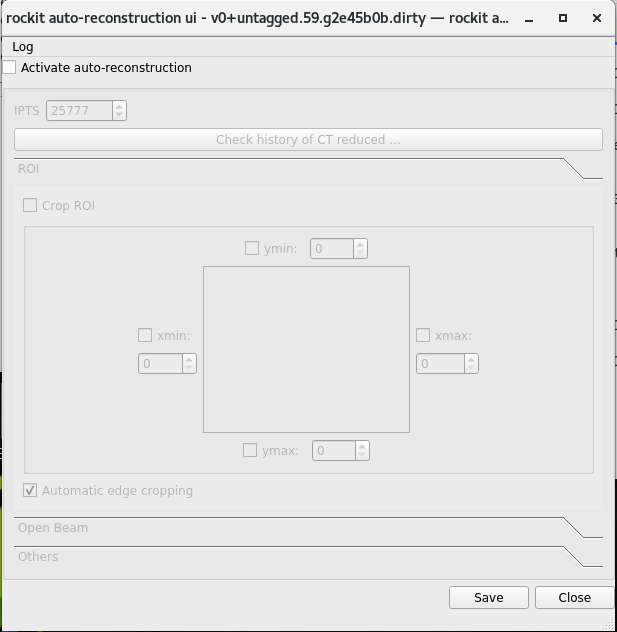
Turn on/off auto-reconstruction
click the activate auto-reconstruction switch. Remember to click SAVE to validate your choice.
Once the auto-reconstruction flag is on, the rest of the user interface will be enabled and you will be able to configure various parameters.
Why do I need to click SAVE each time I make a change? Behind the curtain, every minute a program is launched and check for the content of a config file. This config file is created by this user interface. Every time you click SAVE, that file is replaced by the content of the current interface. The following schema shows the complete workflow of the auto-reconstruction process.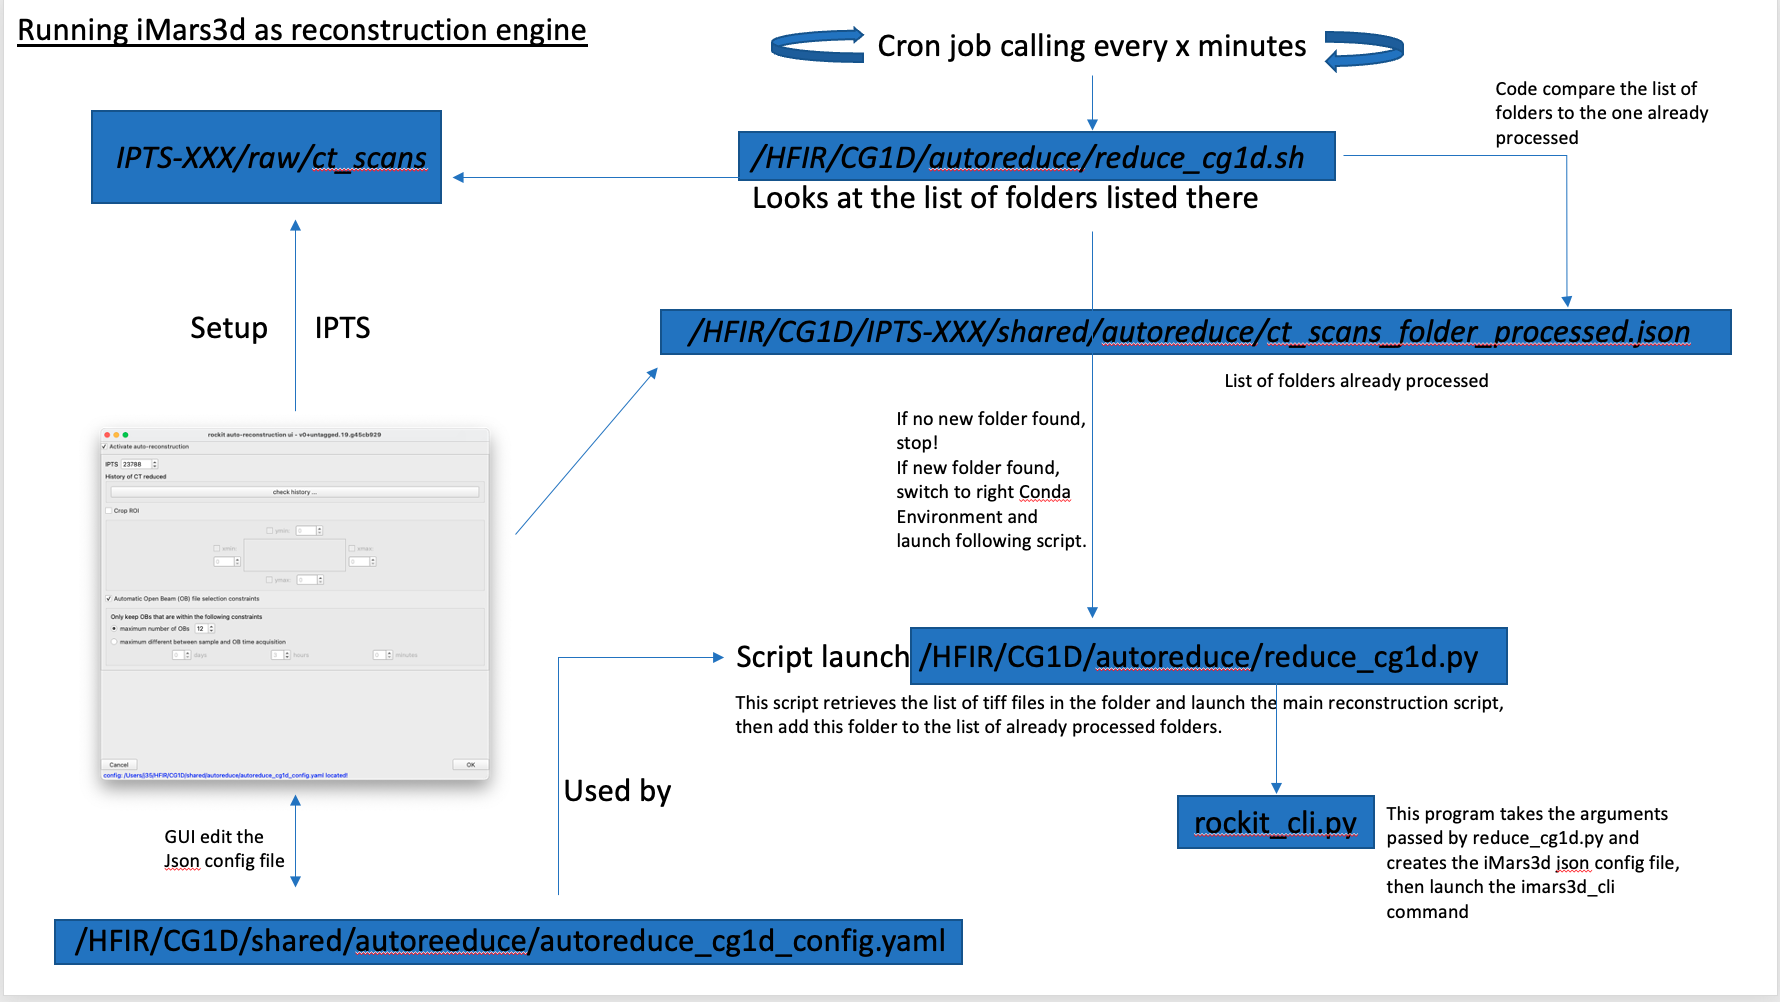
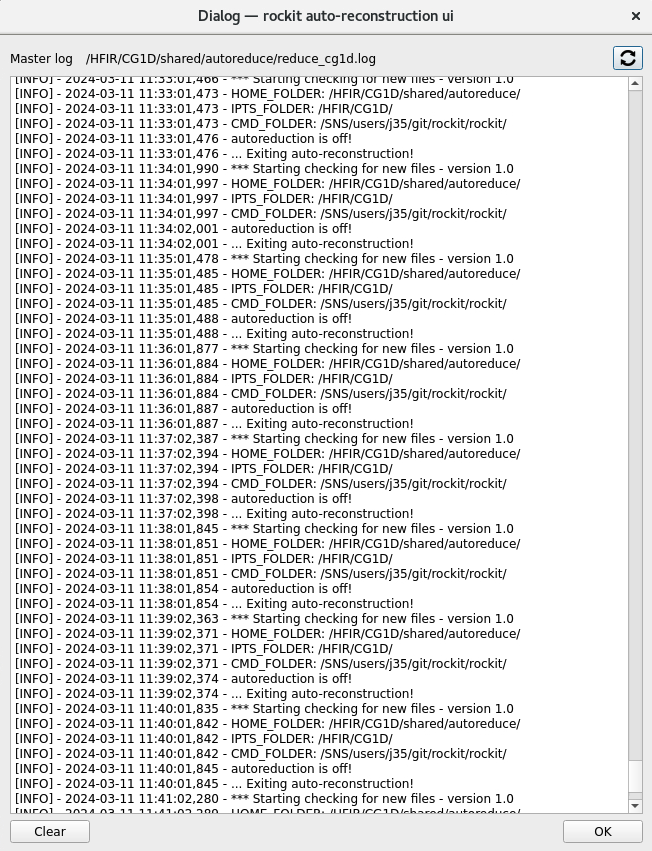
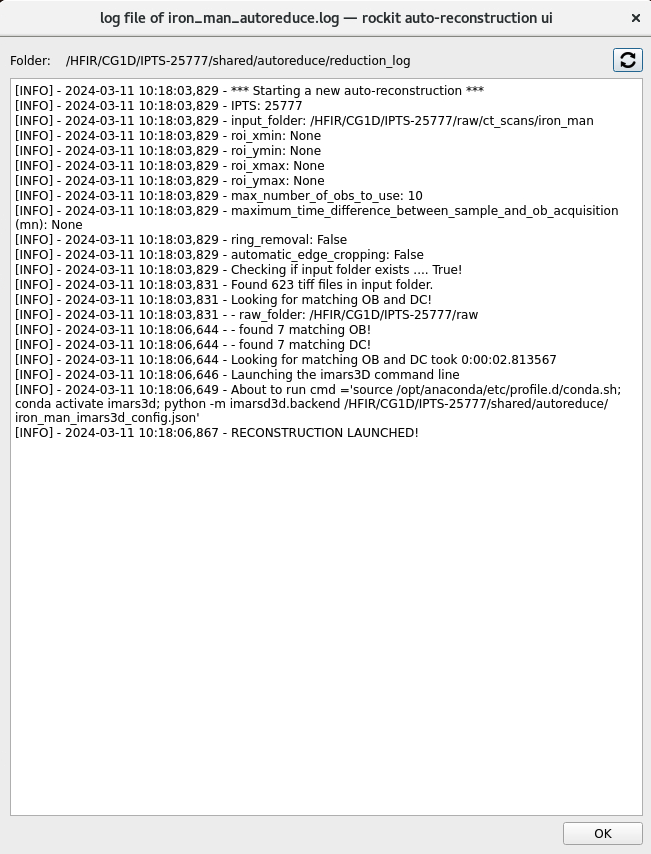
you can check the first part of that workflow by looking at the auto-reconstruction log file.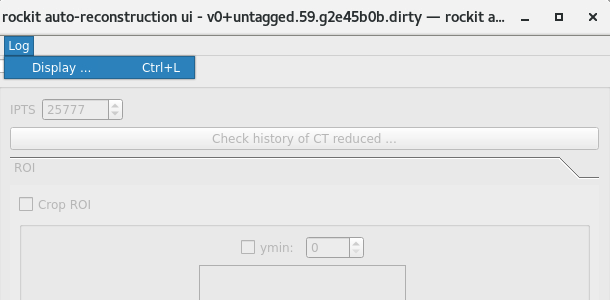
Select IPTS
Enter the IPTS for which you want all the newly created CTs to be reconstructed.
Check the history of CT-reduced
By clicking this switch, you can check the status of all the CT from this IPTS that have been or are currently reconstructed.
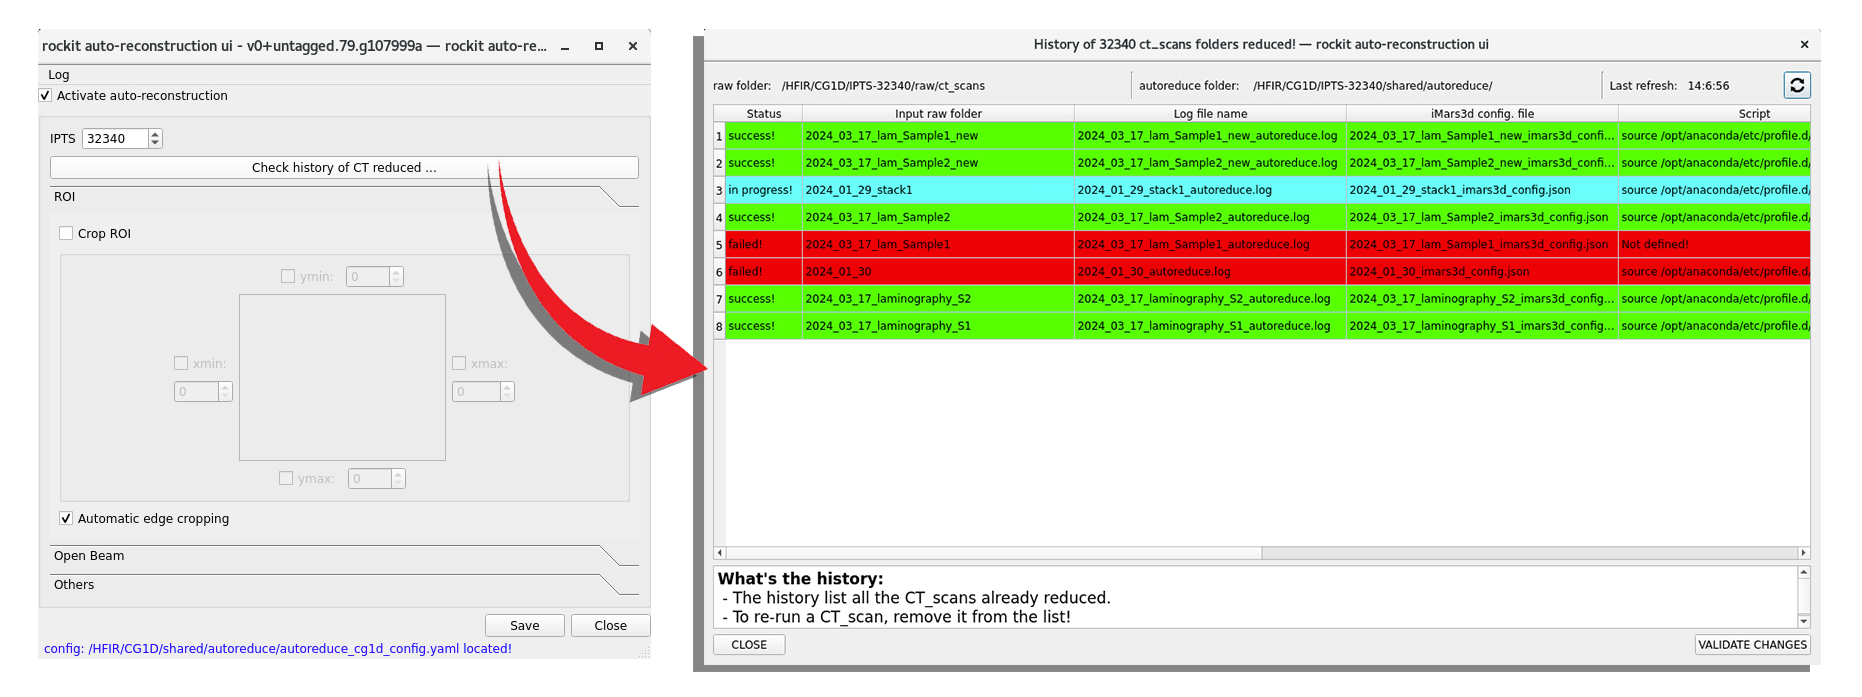
The first column will give you the status of the CT reconstructions. You will see one of the 3 following states:
- in progress!
- success!
- failed!
Right-click any of the rows will give you access to various options:
- For any of the rows/columns selected:
- preview of the reconstruction log displays the log for that particular row
- Automatically re-run reconstruction will remove that row from the runs already reconstructed and will restart it during the next check
- Manually re-run reconstruction will launch the reconstruction directly from the UI on another thread
- preview of the reconstruction log displays the log for that particular row
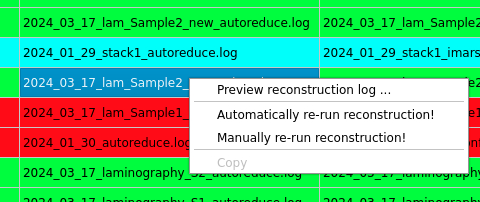
- for the column script
- you will have the option to copy the content of that cell to the clipboard. This way you can paste it in any terminal and run it again manually (used for runs that failed for unknown reasons)
Click the refresh button ![]() to refresh the table and update the status of the various rows.
to refresh the table and update the status of the various rows.
On top of the table, you will find the location of the raw folder, autoreduce folder, and time of the last refresh.
ROI
you can predefine a region of interest (ROI) as well as turn on/off any of the edges region of interest.
If you choose not to turn on the option, no region of interest will be used and the full image size will be used.
The automatic edge cropping option, if turned on, will let the algorithm determine the ROI for you. For more details on the algorithm, check the documentation here.
Open beam
By default the algorithm will use all the matching open beam (OB) (same detector, same slits position and same acquisition time) but you have the option to narrow down that selection by
- limiting the number of open beams
- the maximum time between the sample and the open beam acquisition times
Others
Because the DAS system can not determine when a CT run is done, we had to come up with a solution to figure out the end of a CT. We record the acquisition time of the last image acquired and compare it to the previous one using the following formula.

